Imagine you’ve just launched your WooCommerce store. The products are uploaded, the checkout works, and you’re feeling pretty proud—until you take a closer look at your product pages. They’re functional, sure, but they’re also kind of… bland. The default layout doesn’t quite showcase your products the way you’d envisioned, and you’re starting to wonder how you can make them pop. Sound familiar? Don’t worry—you’re not alone, and I’ve got your back.
Customizing WooCommerce product pages might sound like a job for a coding wizard, but with the right tools and a little guidance, you can transform those pages into something that not only looks amazing but also drives more sales. In this guide, I’ll walk you through how to redesign your WooCommerce product pages like a pro using templates and hooks. We’ll cover everything from the basics to step-by-step instructions, real-world examples, and even some SEO tips to keep your store humming. Whether you’re a blogger, a marketer, or a WordPress enthusiast dipping your toes into development, you’ll find something here to level up your store. Let’s dive in!
Table of Contents
Open Table of Contents
WooCommerce Product Page Overview
At their core, WooCommerce product pages are the individual pages where your customers go to check out each item in your store. Think of them as the virtual equivalent of a product display in a brick-and-mortar shop. They include essentials like the product title, images, description, price, and that all-important “Add to Cart” button.
But here’s the catch: the default WooCommerce setup is a one-size-fits-all deal. It’s great for getting started, but it might not highlight what makes your products unique. Maybe you’re selling handmade jewelry and want to add a “Craftsmanship Details” section, or you’re offering software and need to feature download links front and center. That’s where customization comes in—it lets you tailor these pages to fit your brand and your customers’ needs.
Why Customize Your Product Pages?
So, why bother tinkering with something that already works? Because customization isn’t just about aesthetics—it’s about results. A well-crafted product page can turn casual browsers into buyers. Here’s why it’s worth your time:
- Showcase Your Unique Selling Points: Highlight what sets your products apart, like eco-friendly materials or a lifetime warranty.
- Make Navigation a Breeze: Rearrange elements so customers can find key info without digging.
- Build Trust: Add testimonials, certifications, or guarantees to ease buyer hesitation.
- Boost Conversions: A clear, compelling layout nudges visitors toward that “Add to Cart” button.
When Should You Customize?
There’s no universal “right time” to customize, but here are some moments when it makes sense:
- After Launch: Once your store’s up and running, you’ll have a better sense of what your customers need.
- Poor Performance: If your analytics show low conversions or high bounce rates, your pages might need a refresh.
- Customer Feedback: Are shoppers asking questions that your pages don’t answer? Time to adjust.
- Rebranding or Growth: New products or a fresh brand vibe might call for a matching design.
Even if things are going well, don’t sleep on this—small tweaks can keep your store ahead of the curve.
How to Customize WooCommerce Product Pages
Customizing WooCommerce product pages might seem daunting, but it’s easier than you think once you understand the tools available. Whether you want to completely overhaul the layout or just tweak a few elements, WooCommerce gives you flexible options to make your product pages truly your own. Let’s break down the main methods you can use to achieve a professional, tailored look.
Alright, let’s get to the good stuff—how do you actually do this? The two main tools in your kit are templates and hooks. Templates control the big-picture layout, while hooks let you fine-tune specific spots. Here’s how they work.
Step 1: Set Up a Child Theme
Before you touch anything, create a child theme. This keeps your customizations separate from your main theme, so updates won’t overwrite your work. You can:
- Use a plugin like Child Theme Configurator.
- Or follow the official WordPress guide to do it manually.
Once that’s done, you’re ready to roll.
Step 2: Customize with Templates
Templates are PHP files that dictate how your product pages look. WooCommerce stores its defaults in wp-content/plugins/woocommerce/templates/, but you’ll override them in your child theme.
Here’s how:
- Find the Template: Want to tweak the single product page? Locate
single-product.phpin the WooCommerce plugin folder. - Copy It: Move it to
yourchildtheme/woocommerce/single-product.php. Create thewoocommercefolder if it’s not there. - Edit Away: Adjust the HTML and PHP to rearrange elements—like moving the “Add to Cart” button below the description.
Example: Say you want the product image below the details instead of beside them. You’d tweak single-product.php to reorder the divs. Test it on a staging site first!
Step 3: Use Hooks for Precision
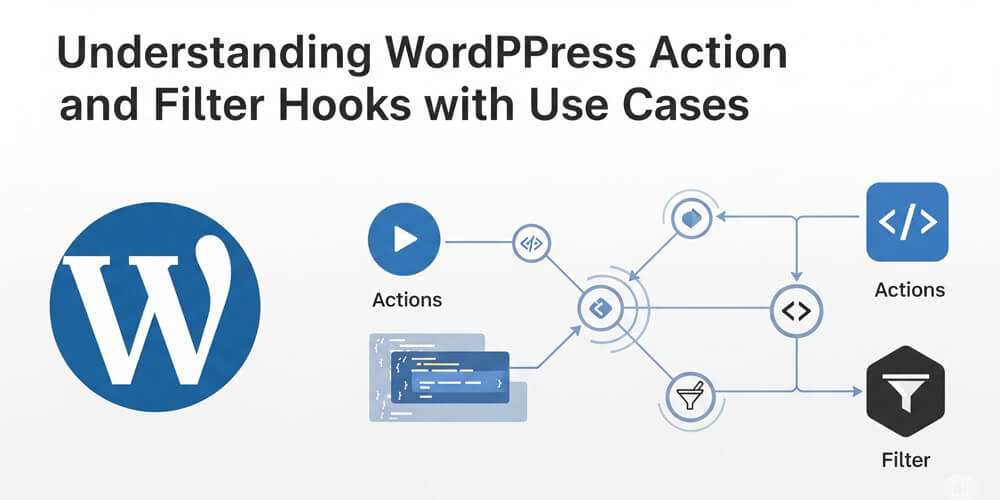
Hooks are one of WooCommerce’s most powerful features for customizing your product pages without editing template files directly. Think of hooks as strategic anchor points scattered throughout WooCommerce’s code—places where you can “hook in” your own functions to add, remove, or modify content and functionality. This approach is ideal for making targeted changes, keeping your customizations organized and update-safe.
- Adding Content: Use
add_actionto insert something new. - Removing Content: Use
remove_actionto take something out.
Example 1: Add a Free Shipping Badge
function add_free_shipping_badge() {
    global $product;
    if ( $product->get_shipping_class() == 'free-shipping' ) {
        echo '<span class="free-shipping-badge">Free Shipping!</span>';
    }
}
add_action( 'woocommerce_single_product_summary', 'add_free_shipping_badge', 15 );
This adds a badge after the product title (priority 15 slots it between the title and price).
Example 2: Remove Product Meta
Don’t want categories and tags cluttering your page?
remove_action( 'woocommerce_single_product_summary', 'woocommerce_template_single_meta', 40 );Add these snippets to your child theme’s functions.php file.
Step 4: Add a Custom Tab
Adding custom tabs is a great way to provide extra information—like specifications, FAQs, or care instructions—without cluttering your main product layout. WooCommerce’s flexible tab system lets you add, remove, or rearrange tabs using just a few lines of code. This approach keeps your product pages clean and organized, while giving customers easy access to the details they care about most.
Let’s combine templates and hooks for something fancier—like a custom tab for product specs. Instead of overriding the whole tabs template, use a filter:
function add_specs_tab( $tabs ) {
    $tabs['specs'] = array(
        'title'    => __( 'Specifications', 'your-text-domain' ),
        'priority' => 50,
        'callback' => 'display_specs_content'
    );
    return $tabs;
}
add_filter( 'woocommerce_product_tabs', 'add_specs_tab' );

function display_specs_content() {
    echo '<h2>Specifications</h2>';
    echo '<ul>';
    echo '<li>Weight: 2kg</li>';
    echo '<li>Dimensions: 10x10x10 cm</li>';
    echo '</ul>';
}
This adds a “Specifications” tab with a simple list. You could pull data from custom fields for a dynamic touch.
Step 5: Test and Refine
Before you launch your new product page to the world, it’s crucial to make sure everything works smoothly and looks great on all devices. Testing and refining your customizations helps catch any issues early, ensures a seamless shopping experience for your customers, and gives you the confidence that your changes are truly making a positive impact. Here’s how to approach this important final step:
- Staging Site: Test changes here first to avoid breaking your live store.
- Mobile Check: Use your phone or a browser tool to ensure responsiveness.
- Customer Feedback: Show a friend or colleague—fresh eyes catch things you miss.
- Analytics Review: After launch, monitor performance. Are conversions up? Bounce rates down? Adjust as needed.
- Backup: Always back up your site before making major changes, just in case.
- Documentation: Keep notes on what you changed and why. This helps if you need to troubleshoot later.
Pros and Cons of Customization Methods
Customizing WooCommerce product pages can be done in several ways, each with its own strengths and tradeoffs. Whether you prefer hands-on coding or a more visual, plugin-based approach, it’s important to understand the pros and cons before diving in. This section will help you choose the method that best fits your skills, goals, and the level of flexibility you need for your store.
Not sure which approach to take? Here’s a breakdown:
| Method | Pros | Cons |
|---|---|---|
| Templates | Total control over layout and design | Needs coding skills, time-intensive |
| Hooks | Precise tweaks, no template overrides | Learning curve for hook locations |
| Plugins | No code required, beginner-friendly | Less flexibility, possible bloat |
| Page Builders | Visual design, easy to use | Can be heavy on resources, limited control |
| Custom CSS | Quick style changes, no PHP needed | Limited to styling, not structural |
| Custom Fields | Add structured data easily | Requires additional setup, may need coding |
| Custom Tabs | Organize info neatly, enhance UX | Can complicate layout, needs coding |
| Custom Shortcodes | Reusable content blocks, easy to implement | Requires coding, can clutter if overused |
| Custom Widgets | Add dynamic content, flexible placement | Requires coding, may conflict with themes/plugins |
Warnings: Mistakes to Avoid
Customizing WooCommerce product pages can be incredibly rewarding, but there are a few common pitfalls that can cause headaches if you’re not careful. Before you dive in, it’s important to be aware of these potential mistakes so you can avoid them and keep your store running smoothly. Here are some of the most frequent issues to watch out for:
I’ve seen these trip up plenty of store owners—don’t let them get you:
- Skipping the Child Theme: Updates will erase your hard work without one.
- Editing Core Files: Modify WooCommerce or theme files directly? Say goodbye to your changes next update.
- Forgetting Mobile: A desktop-only design can tank your mobile sales.
- Overloading the Page: Too many bells and whistles confuse customers and slow your site.
- No Testing: Push untested code live, and you risk a broken store.
- Ignoring SEO: Customizations can hurt your search rankings if you don’t optimize them.
- Not Backing Up: Always back up your site before making changes. If something goes wrong, you’ll be glad you did.
- Neglecting Performance: Heavy customizations can slow down your site. Use tools like Query Monitor to keep an eye on performance.
- Assuming All Changes Are Safe: Some customizations can conflict with plugins or themes. Always test on a staging site first.
- Not Documenting Changes: Keep track of what you change and why. This helps if you need to troubleshoot later.
Customization vs. Plugins
When it comes to customizing WooCommerce product pages, you have two main paths: using plugins or writing custom code. Each approach has its own advantages and limitations, and the best choice depends on your technical comfort level, the complexity of your needs, and how much control you want over the final result. Let’s compare the two so you can decide what’s right for your store.
Here’s a quick comparison of popular WooCommerce product page customization methods:
| Method | Ease of Use | Flexibility | Performance | Requires Coding? | Update-Safe | Best For |
|---|---|---|---|---|---|---|
| Plugins | ★★★★☆ | ★★☆☆☆ | ★★★☆☆ | No | Yes | Beginners, quick changes |
| Custom Code | ★★☆☆☆ | ★★★★★ | ★★★★★ | Yes | Yes (with child theme) | Full control, unique layouts |
| Page Builders | ★★★★★ | ★★★☆☆ | ★★☆☆☆ | No | Yes | Visual design, non-coders |
| Custom CSS | ★★★★☆ | ★★☆☆☆ | ★★★★★ | Basic | Yes | Styling tweaks |
| Custom Fields | ★★★☆☆ | ★★★★☆ | ★★★★☆ | Sometimes | Yes | Structured product info |
| Shortcodes | ★★★☆☆ | ★★★☆☆ | ★★★★☆ | Yes | Yes | Reusable content blocks |
| Widgets | ★★★☆☆ | ★★★☆☆ | ★★★★☆ | Sometimes | Yes | Dynamic sidebar/footer content |
For quick wins, plugins are great. For a bespoke look, code is king.
Customizing your WooCommerce product pages might feel like a big leap, but it’s totally doable with templates and hooks. Start with a small tweak—like a custom badge or tab—and build your confidence from there. Your store isn’t just a shop; it’s an experience, and these changes help it shine.
Don’t stop here—keep experimenting, testing, and listening to your customers. The perfect product page is a moving target, but that’s half the fun.
FAQ
Q: Do I need coding skills to customize my product pages?
A: Not always! Plugins can handle basic changes, but for full control, a little code goes a long way.
Q: What’s the difference between templates and hooks?
A: Templates overhaul the whole layout; hooks tweak specific bits without touching the big picture.
Q: Can page builders help with this?
A: Yep! Tools like Elementor Pro let you design visually—no code required.
Q: How do I keep customizations mobile-friendly?
A: Test on real devices and use responsive CSS. Don’t assume desktop perfection translates.
Q: What if an update breaks my changes?
A: Use a child theme and test updates on a staging site. If something breaks, check hook or template changes in the update notes.
Further Reading
Want to dig deeper? Check these out:
Ready to jazz up your product pages? Start small, test it out, and watch the magic happen. Loved this guide? Subscribe for more WordPress goodness, or drop a comment with your customization wins—I’d love to hear them!


