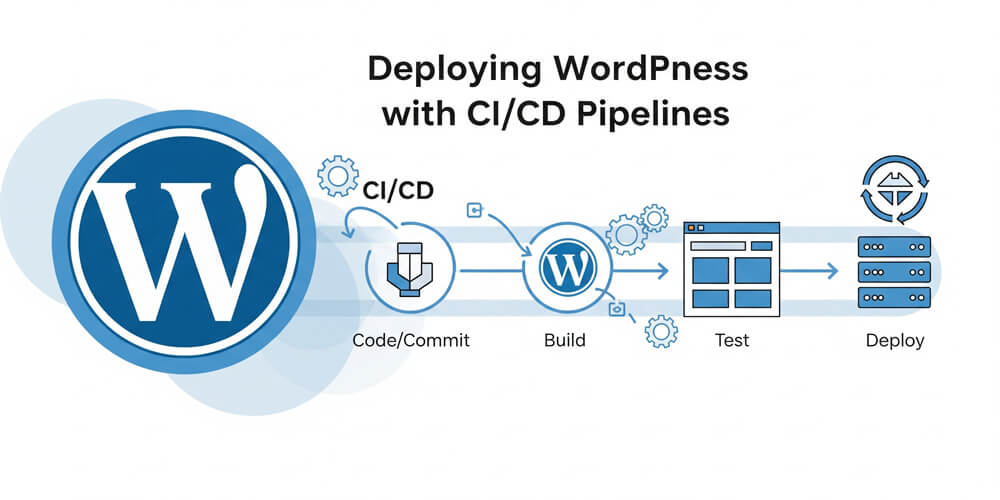
The adoption of Continuous Integration and Continuous Deployment (CI/CD) practices has significantly transformed the way WordPress sites are developed and maintained. By automating the process of building, testing, and deploying code, CI/CD reduces manual intervention and the risk of human error, leading to more reliable and secure websites. Teams can collaborate more efficiently, quickly deliver new features, and respond to issues with greater agility. For WordPress developers, integrating CI/CD means faster release cycles, consistent environments, and the ability to roll back changes seamlessly. Ultimately, CI/CD empowers organizations to scale their WordPress projects with confidence and efficiency.
Table of Contents
Open Table of Contents
CI/CD for WordPress Overview
Continuous Integration and Continuous Deployment (CI/CD) help automate the development, testing, and deployment of WordPress websites, making the process more efficient, reliable, and scalable. In this guide, we’ll walk through setting up a CI/CD pipeline for WordPress using GitHub Actions and deploying to a cloud provider.
Benefits of CI/CD for WordPress:
- Automated testing before deploying changes.
- Consistent deployments across different environments.
- Faster release cycles and improved collaboration.
- Rollback capabilities for safer updates.
- Less human intervention, reducing errors.
2. Prerequisites for Setting Up a WordPress CI/CD Pipeline
Ensure you have:
- A Git repository (GitHub, GitLab, Bitbucket, etc.)
- A hosting environment (DigitalOcean, AWS, Kinsta, Cloudways, etc.)
- SSH or SFTP access to the server
- A staging and production environment
- WP-CLI installed on the server (optional but recommended)
3. Step-by-Step CI/CD Setup for WordPress
Before diving into the technical setup, it’s important to outline the next steps in building your WordPress CI/CD pipeline. We’ll cover configuring your repository, setting up automated workflows, and preparing your server for seamless deployments. Following these steps will ensure a smooth and reliable deployment process for your WordPress projects.
A. Configure GitHub Actions for CI/CD
- Create a
.github/workflows/deploy.ymlfile in your repository. - Define jobs for testing and deployment.
Example GitHub Actions workflow:
name: Deploy WordPress

on:
  push:
    branches:
      - main

jobs:
  build:
    runs-on: ubuntu-latest
    steps:
      - name: Checkout repository
        uses: actions/checkout@v2

      - name: Install Dependencies
        run: npm install # Modify if using Composer

      - name: Run Tests
        run: npm test # Use PHPUnit if applicable

  deploy:
    runs-on: ubuntu-latest
    needs: build
    steps:
      - name: Deploy via SSH
        uses: appleboy/ssh-action@master
        with:
          host: ${{ secrets.SSH_HOST }}
          username: ${{ secrets.SSH_USER }}
          key: ${{ secrets.SSH_PRIVATE_KEY }}
          script: |
            cd /var/www/html
            git pull origin main
            wp cache flush
B. Configure Server for Deployment
- Set up SSH keys: Generate SSH keys and add the public key to the server.
- Ensure Git is installed on the server: Run
git --versionto verify. - Allow deployments from GitHub Actions by adding SSH keys to GitHub secrets.
C. Database Migrations and WP-CLI Integration
For database migrations, you can use WP-CLI to handle database changes automatically. This is crucial for maintaining data integrity and ensuring that your WordPress site functions correctly after each deployment.
For automatic database updates:
wp db export backup.sql
wp db import new_changes.sql
Or use a migration plugin like WP Migrate DB.
4. Deploying WordPress with Docker and Kubernetes
Deploying WordPress with Docker and Kubernetes enables you to achieve greater scalability, portability, and consistency across environments. This approach allows you to containerize your WordPress application, manage deployments efficiently, and orchestrate resources using Kubernetes, making it easier to handle traffic spikes and streamline updates in production.
For a more scalable approach:
A. Create a Dockerfile
Add the following Dockerfile to the root of your project directory. This file defines how your WordPress application will be containerized. It uses the official WordPress image, copies your project files into the container, and sets the correct permissions. This setup ensures your custom code and plugins are included in the Docker image for deployment.
Create a file named Dockerfile in your project root and add:
FROM wordpress:latest
COPY . /var/www/html
RUN chown -R www-data:www-data /var/www/html
B. Set Up a Kubernetes Deployment
To deploy WordPress on Kubernetes, create a deployment YAML file. This file defines the desired state of your WordPress application, including the number of replicas, container image, and ports. Kubernetes will manage the deployment, ensuring that the specified number of replicas is always running.
Add the following YAML to your deployment.yaml file:
apiVersion: apps/v1
kind: Deployment
metadata:
  name: wordpress-deployment
```yaml
apiVersion: apps/v1
kind: Deployment
metadata:
  name: wordpress-deployment
spec:
  replicas: 2
  selector:
    matchLabels:
      app: wordpress
  template:
    metadata:
      labels:
        app: wordpress
    spec:
      containers:
      - name: wordpress
        image: wordpress:latest
        ports:
        - containerPort: 80
Deploy using:
kubectl apply -f deployment.yaml5. Rollback Strategies
Rollback strategies are essential for ensuring that your WordPress site remains stable and functional in case of deployment failures. By implementing effective rollback mechanisms, you can quickly revert to a previous version of your code or database, minimizing downtime and maintaining a seamless user experience.
If something goes wrong, rollback with:
git revert HEAD~1Or use WP-CLI:
wp plugin deactivate faulty-plugin6. Best Practices for WordPress CI/CD
-
Keep Environments Consistent
Ensure your development, staging, and production environments closely match to avoid unexpected issues during deployment. -
Automate Backups
Schedule regular backups of your files and database before each deployment to enable quick recovery in case of failures. -
Use Environment Variables for Secrets
Store sensitive information like API keys and database credentials in environment variables or secret managers, not in your codebase. -
Test Before Deploying
Integrate automated testing (unit, integration, and end-to-end) into your CI pipeline to catch bugs early and maintain code quality. -
Monitor Deployments
Set up monitoring and alerting to track deployment status and site health, enabling rapid response to issues. -
Document Your Pipeline
Maintain clear documentation for your CI/CD workflows, so team members can understand and troubleshoot the process easily. -
Implement Access Controls
Restrict who can trigger deployments and manage secrets to reduce the risk of unauthorized changes.
Using CI/CD pipelines for WordPress enhances efficiency, reliability, and security. Whether using GitHub Actions, Docker, or Kubernetes, automation streamlines your workflow, allowing you to focus on developing great content and features.
Further Reading
- WordPress Developer Resources
- GitHub Actions Documentation
- WP-CLI Official Site
- Docker for WordPress
- Kubernetes Documentation
- How to continuously deploy your WordPress site to Kinsta with GitHub Actions
Are you ready to automate your WordPress deployments? 🚀
Let me know if you have any questions or need further assistance in setting up your CI/CD pipeline in the comments below. Happy coding!