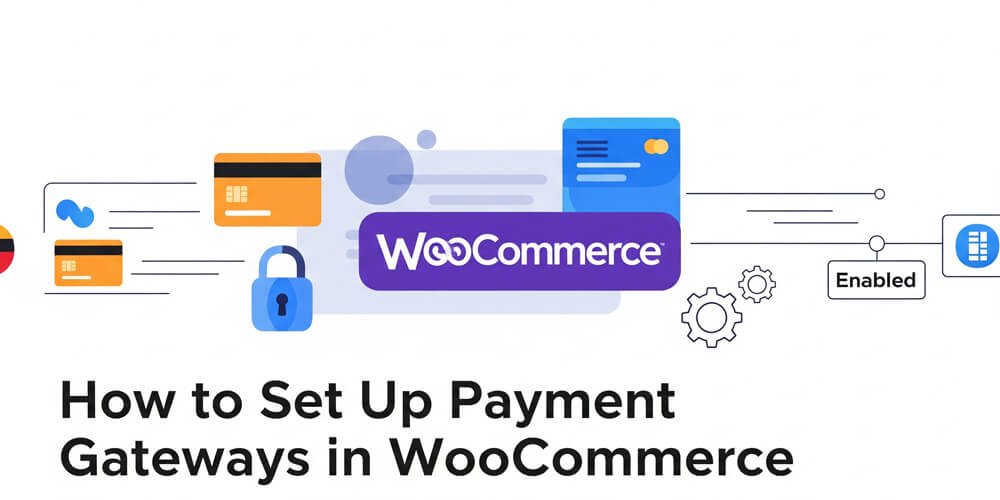
Launching your WooCommerce store is exciting—your products are ready, your branding is on point, and you’re eager for those first sales. But before you can celebrate, there’s a crucial step: enabling your customers to pay you securely and easily. That’s where payment gateways come in. These services act as the bridge between your online store and your customers’ preferred payment methods, handling everything from credit cards to digital wallets. Setting up payment gateways might sound technical, but WooCommerce makes the process straightforward.
In this guide, I’ll walk you through everything you need to know about configuring payment gateways in WooCommerce, focusing on heavy hitters like PayPal and Stripe. I’ve set up dozens of stores over the years—some for small bloggers, others for big e-commerce players—so I’ll share the tricks I’ve learned along the way. Whether you’re a WordPress newbie or a seasoned marketer, you’ll find clear steps, real-world examples, and a few “aha!” moments to get your store ready to rake in sales. Let’s dive in!
Table of Contents
Open Table of Contents
Payment Gateways Overview
Payment gateways are the tech behind the scenes that make online shopping possible. They securely process your customers’ payment details—think credit cards, PayPal balances, or even Apple Pay—verify the transaction, and move the money to your account. In a nutshell, they’re your store’s digital cash register.
WooCommerce supports a ton of gateways out of the box: PayPal, Stripe, Square, even bank transfers if you’re old-school. Each one comes with its own flavor—some are dead simple to set up, others offer fancy features like subscriptions or multi-currency support. Picking the right one depends on your store, but don’t worry—we’ll break it all down.
Why Are Payment Gateways Important?
You wouldn’t open a brick-and-mortar shop without a way to take cash or cards, right? Online, it’s the same deal. Here’s why payment gateways are a big deal:
- Trust: People won’t hand over their card details unless they feel safe. Big names like PayPal and Stripe scream “legit.”
- Flexibility: More payment options—like cards, digital wallets, or local methods—mean fewer customers bouncing at checkout.
- Reach: Want to sell globally? Gateways that handle multiple currencies can open doors to new markets.
- Speed: Quick transactions keep your cash flow humming and your customers happy.
When Should You Set Up Payment Gateways?
Timing matters. Here’s when to get your gateways in gear:
- Pre-Launch: Set them up before your store goes live. You don’t want a customer hitting a dead end at checkout on day one.
- Growth Spurts: Adding new products or targeting new countries? You might need a gateway that supports subscriptions or exotic currencies.
- Customer Requests: If folks keep asking “Can I pay with X?”—say, Venmo or Klarna—it’s time to listen.
A quick tip from experience: Test everything in sandbox mode first. It’s like a practice run with fake money—saves you from real-world disasters.
How to Set Up PayPal and Stripe in WooCommerce
Before you can accept payments in your WooCommerce store, you need to connect a payment gateway. This section will guide you through setting up two of the most widely used options—PayPal and Stripe. Both are trusted by millions of businesses and offer secure, flexible ways for your customers to pay. Whether you’re just starting out or looking to optimize your checkout, these steps will help you get up and running smoothly.
Alright, let’s roll up our sleeves and set up two of the most popular gateways: PayPal and Stripe. I’ll give you the step-by-step, plus some examples from stores I’ve worked on.
Setting Up PayPal
PayPal’s a crowd-pleaser—easy to set up and trusted by millions. Here’s how to get it going:
- Get a PayPal Business Account: No account yet? Sign up at paypal.com. A business account lets you accept payments, not just send them.
- Enable PayPal in WooCommerce: Go to WooCommerce > Settings > Payments, find PayPal Standard, and click Set Up.
- Link Your Account: Enter the email tied to your PayPal account.
- Tweak Settings:
- Check “Enable PayPal sandbox” to test with fake transactions.
- Set up Instant Payment Notifications (IPN) in PayPal (under Profile > My Selling Tools) for real-time order updates.
- Pick a checkout style—keep it simple or branded.
- Save and Test: Hit save, then run a test order in sandbox mode.
Pro Tip: Sandbox mode is your friend. I once skipped it and had a live store rejecting payments—embarrassing fix at 2 a.m.
Setting Up Stripe
Stripe’s a powerhouse—flexible, developer-friendly, and perfect for subscriptions. Here’s the drill:
- Create a Stripe Account: Sign up at stripe.com. It’s free and quick.
- Add the Plugin (Optional): WooCommerce has Stripe built-in, but grab the official Stripe plugin for extras like Apple Pay.
- Enable Stripe: In WooCommerce > Settings > Payments, find Stripe and click Set Up.
- Add API Keys:
- Log into Stripe, go to Developers > API Keys.
- Copy the Publishable Key and Secret Key into WooCommerce.
- Customize It:
- Choose accepted card types (Visa, Mastercard, etc.).
- Enable Apple Pay or Google Pay if you’re fancy.
- Set up webhooks in Stripe (Developers > Webhooks) for order sync.
- Test First: Switch to test mode, use Stripe’s test card numbers (like 4242 4242 4242 4242), and confirm it works.
Pro Tip: Stripe’s dashboard is slick, but don’t get lost in the features. Focus on what you need—like refunds and customer management.
Pros and Cons of Popular Gateways
With so many payment gateways available, it’s important to weigh the strengths and weaknesses of each before making your choice. The right gateway can impact your store’s conversion rates, customer trust, and even your bottom line. Below is a quick comparison of the most popular options to help you decide which fits your business needs best.
Choosing a gateway? Here’s a quick rundown:
| Gateway | Pros | Cons |
|---|---|---|
| PayPal | Easy setup, trusted name, wide reach | Higher fees (2.9% + $0.30 per sale) |
| Stripe | Flexible, supports subscriptions, modern | Needs API setup, less beginner-friendly |
| Square | Perfect for online + in-person sales | Weaker global support |
| Authorize.Net | Top-tier security, lots of options | Monthly fees ($25+) can sting |
Common Mistakes to Avoid
Setting up payment gateways can feel overwhelming, especially with so many options and settings to configure. Even experienced store owners sometimes make mistakes that can cost sales or create headaches down the line. By understanding the most common pitfalls before you launch, you’ll save yourself time, money, and frustration—and ensure your checkout process is smooth for every customer.Here are the top blunders I’ve seen (and made) when setting up payment gateways:
- No Testing: A live store with a broken gateway is a ghost town. Test every step.
- Fee Blindness: PayPal’s 2.9% stung a client until we switched low-ticket items to Stripe.
- No SSL: Without that “https://” and padlock, customers bolt. Get a free SSL from Let’s Encrypt if your host doesn’t provide one.
- Refund Chaos: Know each gateway’s refund process—Stripe’s dashboard is slick, PayPal’s a maze.
- Too Many Options: Five gateways sound great until customers freeze at checkout. Stick to 2-3 max.
- Ignoring Mobile: If your checkout isn’t mobile-friendly, you’re losing sales. Test on phones and tablets.
- Not Updating: Gateways change. Keep your plugins updated to avoid security holes and new features.
- Skipping Documentation: Each gateway has quirks. Read the docs to avoid rookie mistakes.
- Overlooking Security: Use strong passwords, enable two-factor authentication, and keep your site secure. A breach can tank your reputation.
- Neglecting Customer Support: If something goes wrong, you’ll want quick help. Check each gateway’s support options before committing.
Payment Gateways vs. Plugins
WooCommerce has built-in gateways, but plugins can level you up. Here’s the scoop:
| Gateway/Plugin | Built-In? | Supports Subscriptions | Multi-Currency | Popular Payment Methods | Fees | Ease of Setup |
|---|---|---|---|---|---|---|
| PayPal Standard | Yes | No | Limited | PayPal, Cards | 2.9% + $0.30/txn | Easy |
| Stripe | Yes | Yes | Yes | Cards, Apple/Google Pay | 2.9% + $0.30/txn | Moderate |
| WooCommerce Payments | Plugin | Yes | Yes | Cards, Apple/Google Pay | 2.9% + $0.30/txn | Easy |
| Mollie | Plugin | Yes | Yes | iDEAL, SEPA, Cards, PayPal | Varies by method | Moderate |
| Square | Yes/Plugin | No | Limited | Cards, Square Wallet | 2.9% + $0.30/txn | Easy |
| Authorize.Net | Plugin | Yes | Yes | Cards, eChecks | $25/mo + txn fees | Moderate |
| Crypto Gateways | Plugin | No | Yes | Bitcoin, Ethereum, etc. | Varies | Moderate |
For 90% of stores, built-ins do the trick. Plugins shine when you need something specific—like PayPal’s one-click checkout.
Setting up payment gateways in WooCommerce is like tuning an engine—get it right, and your store purrs. PayPal and Stripe are your go-tos, but the real magic is in testing, tweaking, and keeping your customers in mind. I’ve seen stores go from zero to hero just by swapping a clunky gateway for something slicker.
Take an hour, follow these steps, and watch the sales roll in. You’ve got this!
Frequently Asked Questions (FAQ)
-
Can I use multiple gateways?
Yes! Two or three options can boost conversions—just don’t overdo it. -
Is an SSL certificate mandatory?
Yes, for security and trust. Most hosts offer free ones now. -
How do refunds work?
In WooCommerce, process them via the order screen. Each gateway has its own dashboard too. -
Which gateway’s best for global sales?
Stripe or PayPal—they handle currencies like champs. -
Are there hidden fees?
Not hidden, but watch per-transaction rates (e.g., 2.9% + $0.30). Check each gateway’s pricing page. -
Can I accept cryptocurrencies?
Yes, with plugins like Coinbase Commerce or BitPay. They’re not mainstream yet, but growing. -
What if I change my mind later?
You can switch gateways, but it’s a hassle. Plan ahead and choose wisely. -
How do I handle chargebacks?
Each gateway has its own process. Generally, you’ll need to provide evidence (like shipping info) to dispute it. -
Can I customize the checkout experience?
Yes, with plugins or custom code. You can add fields, change button text, or even style the checkout page to match your brand. -
Do I need a business license to use these gateways?
It depends on your country and business type. Check local regulations, but most gateways don’t require one to start. -
How do I handle taxes with these gateways?
WooCommerce has built-in tax settings. You can configure tax rates based on your location and the products you sell. Most gateways will automatically calculate taxes during checkout. -
Can I add custom payment methods?
Yes, you can develop your own gateway or use plugins to add local or niche payment methods. -
Is it possible to restrict gateways by country or product?
Yes, WooCommerce and some plugins let you enable or disable gateways based on customer location or specific products. -
Can I set minimum or maximum order amounts for certain gateways?
Yes, many gateway plugins allow you to set order amount limits for when a payment method appears. -
How do I test payment gateways before going live?
Use sandbox or test modes provided by gateways like PayPal and Stripe. Always run test transactions before launch. -
Can I add custom events without plugins?
Yes, you can add custom events by extending the WooCommerce checkout process with hooks or JavaScript.
Further Reading
Dig deeper with these gems:
Got questions? Drop a comment below or subscribe for more WooCommerce goodness. Happy selling!