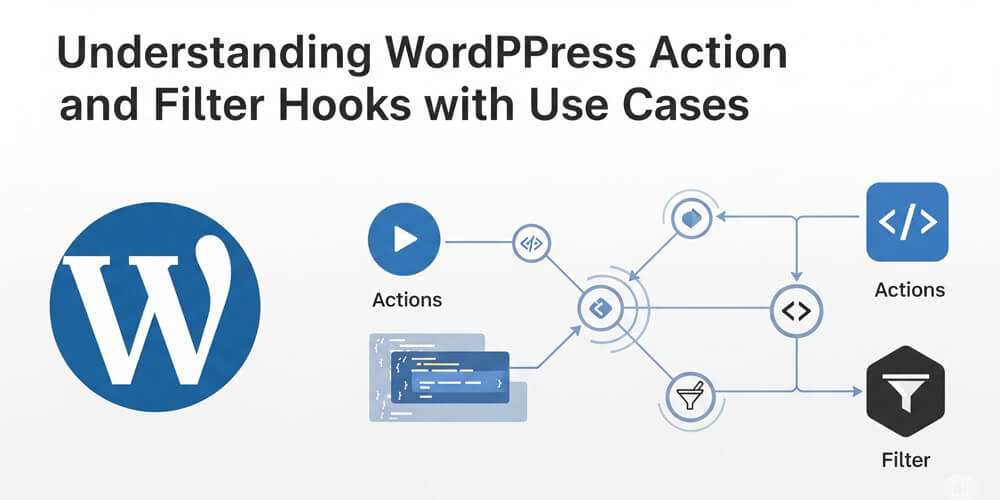
WordPress hooks are the backbone of its extensibility, empowering developers to modify, extend, or enhance site functionality without ever touching the core WordPress files. Think of hooks as strategic anchor points scattered throughout the WordPress codebase—places where you can “hook” your own custom code to change how WordPress behaves or outputs data. This system is what enables plugins and themes to seamlessly add features, alter content, or interact with other plugins, all while keeping your site update-safe.
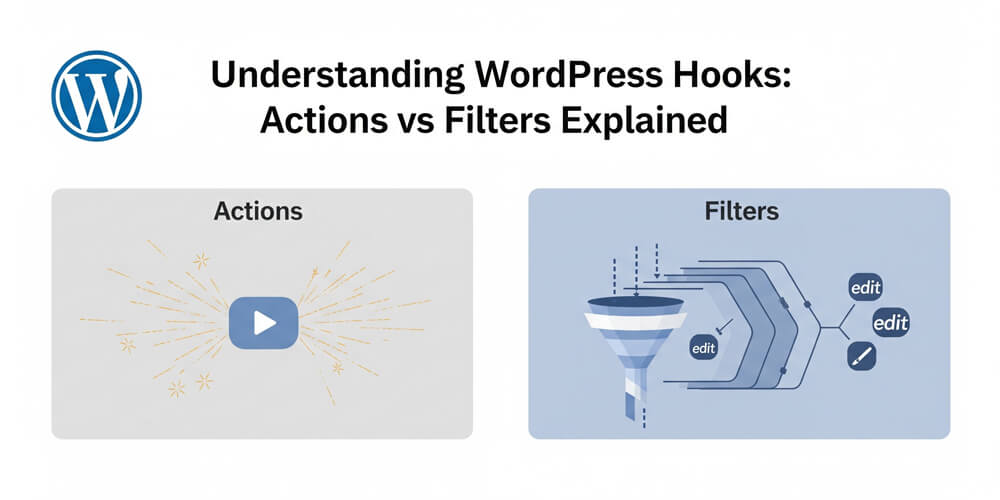
There are two main types of hooks: actions and filters. Actions let you execute your own code at specific moments in the WordPress lifecycle, such as when a post is published or a page loads. Filters, on the other hand, allow you to intercept and modify data before it’s displayed or saved, like tweaking a post title or customizing excerpt text. Together, actions and filters form the foundation of nearly every WordPress customization, from simple tweaks to complex plugins.
If you’re new to WordPress development, hooks can seem a bit mysterious at first. But once you understand how they work, you’ll unlock a world of possibilities for customizing your site. In this guide, I’ll break down the differences between actions and filters, walk you through practical, real-world examples, and share insights from my own experience building custom plugins and themes. By the end, you’ll have the confidence and know-how to leverage hooks in your own projects and take your WordPress skills to the next level.
Table of Contents
Open Table of Contents
What Are WordPress Hooks?
WordPress hooks are mechanisms that let developers inject custom code into specific points of the WordPress execution process, making the platform highly extensible and customizable. Hooks act as “interception points” in the core code, where you can attach your own functions to alter or extend default behavior—without modifying WordPress itself.
There are two main types of hooks:
-
Actions: Actions allow you to add or execute custom code at specific moments in the WordPress lifecycle. For example, you might use an action to send an email when a post is published, add a custom message to the footer, or enqueue scripts and styles. Actions do not modify data—they simply perform tasks at certain events.
-
Filters: Filters let you intercept and modify data before it is displayed on the site or saved to the database. For instance, you can use a filter to change the content of a post before it’s rendered, adjust the excerpt length, or customize the output of a widget. Filters always receive data, modify it, and return the new value.
By leveraging hooks, developers can create plugins and themes that interact seamlessly with WordPress and other plugins, ensuring changes are update-safe and maintainable. Understanding how and when to use actions and filters is fundamental to professional WordPress development.
Why Use Hooks?
- Customization: Hooks empower you to add, remove, or modify features at almost any point in WordPress, all without touching core files. This means you can tailor your site’s behavior and appearance to fit any need, from simple tweaks to advanced functionality.
- Safety: By using hooks in plugins or child themes, your customizations remain intact even after WordPress core, theme, or plugin updates. This update-safe approach protects your work and reduces maintenance headaches.
- Flexibility: Hooks are used everywhere—from blogs and portfolios to e-commerce stores and membership sites. You can extend WordPress to support custom workflows, integrations, or business logic, making it suitable for virtually any project.
- Reusability: Well-written hook-based code is modular and portable. You can reuse your custom functions across multiple sites or projects, speeding up development and ensuring consistency.
- Community Standards: Hooks are the foundation of WordPress’s plugin and theme ecosystem. Following this approach means your code aligns with best practices, making it easier for other developers to understand, maintain, and extend your work.
- Collaboration: Since hooks are a shared convention, they make it easier for teams or third-party plugins/themes to interact and build on each other’s work without conflict.
When to Use Hooks?
- Theme Customization: Use hooks to add, remove, or modify theme features such as custom headers, footers, sidebars, or navigation menus. For example, you can insert a banner before the content, add social icons to the footer, or change the way post metadata is displayed—all without editing the theme’s core files.
- Plugin Development: Hooks are essential for building plugins that interact with WordPress or other plugins. You can create new features, extend existing functionality, or modify plugin behavior by hooking into specific actions or filters. For instance, you might add a custom post type, integrate with third-party APIs, or alter WooCommerce checkout fields.
- Performance Tweaks: Optimize your site by using hooks to remove unnecessary scripts, styles, or meta tags, and to defer or conditionally load assets. You can also use hooks to clean up the WordPress head section, disable emojis, or limit resource-heavy features on certain pages for faster load times.
- Client Projects: Deliver tailored solutions for clients by leveraging hooks to implement custom workflows, automate tasks, or add business-specific features. This approach ensures your changes are update-safe and maintainable, making it easier to support and scale client sites over time.
- Content Personalization: Use hooks to dynamically modify content based on user roles, location, or device. For example, display targeted messages to logged-in users, show region-specific offers, or adjust layouts for mobile visitors.
- Security Enhancements: Strengthen your site by hooking into login, registration, or comment actions to add custom validation, logging, or notifications. You can also use hooks to restrict access, sanitize user input, or integrate with security plugins.
Where to Use Hooks?
Hooks can be used in several places within your WordPress setup, each serving different purposes and offering varying levels of flexibility and maintainability:
-
Child Themes: Place your hook-related code in the
functions.phpfile of a child theme to customize or extend the parent theme’s behavior without modifying its core files. This is ideal for theme-specific tweaks, such as adding custom widgets, modifying layouts, or injecting content in specific template locations. Using a child theme ensures your changes are preserved when the parent theme is updated. -
Custom Plugins: For functionality that should be independent of the active theme—or reused across multiple sites—create a custom plugin. Plugins are the recommended way to package features, integrations, or enhancements that aren’t tied to a theme’s design. By leveraging hooks in plugins, you can add or modify features, integrate with third-party services, or alter WordPress behavior globally, all while keeping your code modular and update-safe.
-
Must-Use (MU) Plugins: These are special plugins placed in the
wp-content/mu-pluginsdirectory. MU plugins are automatically activated and cannot be deactivated from the admin dashboard. They’re perfect for essential site-wide customizations or security enhancements that must always run, such as enforcing login restrictions or disabling XML-RPC. -
WordPress Core: WordPress itself provides thousands of built-in hooks—both actions and filters—embedded throughout its core codebase. You can “tap into” these hooks to run your custom functions at key points in the WordPress lifecycle, such as during initialization, when content is saved, or when pages are rendered. The WordPress Codex and Developer Reference offer comprehensive lists and documentation for all available hooks.
-
Third-Party Plugins and Themes: Many popular plugins and themes expose their own custom hooks, allowing you to extend or modify their functionality without editing their source code. For example, WooCommerce provides hooks for customizing checkout fields, emails, and product displays, while page builders like Elementor or WPBakery offer hooks for adding custom widgets or controls.
Best Practice:
Always add your hook code to a child theme or a custom plugin, not directly to the parent theme or WordPress core files. This approach keeps your changes update-safe and easier to maintain.
Use tools like Query Monitor or the Debug Bar plugin to discover available hooks on your site and debug hook-related issues.
Understanding Actions vs. Filters
Actions
Actions are triggered at specific points during WordPress’s execution, such as when a post is published, a user logs in, or a page is rendered. When you “hook” a function to an action, you’re telling WordPress to run your custom code at that exact moment in the workflow. Actions are ideal for performing tasks, injecting content, or triggering side effects—they don’t modify existing data, but rather allow you to add new behavior.
When to use actions:
- Sending notification emails after a post is published
- Enqueuing scripts and styles on the front end
- Adding custom HTML to the header or footer
- Logging user activity or analytics events
- Registering custom post types or taxonomies
Example: Adding a welcome message to the footer using the wp_footer action:
add_action( 'wp_footer', 'my_custom_footer_message' );
function my_custom_footer_message() {
    echo '<p style="text-align: center;">Thanks for visiting!</p>';
}
Filters
Filters modify data before it’s displayed on the site or saved to the database. When you “hook” a function to a filter, you’re telling WordPress to pass specific data (like a post title, excerpt, or content) through your function, allowing you to change, extend, or sanitize it before it’s used or shown to visitors.
Filters always receive at least one parameter—the data to be filtered—and must return a value (the modified or original data). This makes filters ideal for customizing output, enforcing formatting, or integrating with other plugins and services.
When to use filters:
- Changing post titles or content before display
- Modifying excerpt length or “read more” text
- Adjusting widget output or menu items
- Sanitizing or formatting user input
- Integrating with SEO or translation plugins
Example: Modifying the post title to append custom text:
add_filter( 'the_title', 'my_custom_title' );
function my_custom_title( $title ) {
    return $title . ' - My Blog';
}
Key Difference: Actions do something (e.g., output text), while filters modify something (e.g., change data). Let’s summarize the differences in a table:
| Feature | Actions | Filters | Example Hook Name | Receives Data? | Must Return Value? | Typical Use Case |
|---|---|---|---|---|---|---|
| Purpose | Execute code | Modify data | wp_footer | No | No | Add footer HTML |
| Data Flow | One-way (no return) | Two-way (input/output) | the_title | Yes | Yes | Change post title |
| Parameters | Usually none or event | Data to be filtered | init | Sometimes | No | Register post types |
| Return Value | Ignored | Required | excerpt_more | Yes | Yes | Customize excerpt “read more” |
| Side Effects | Yes (output, DB, etc.) | No (should not output) | admin_notices | No | No | Show admin messages |
| Chaining | Not chainable | Chainable (multiple mods) | the_content | Yes | Yes | Append content to posts |
| Typical Use Location | Any plugin/theme file | Any plugin/theme file | widget_title | Yes | Yes | Modify widget titles |
Step-by-Step Guide to Using Hooks
Let’s create a simple plugin that uses both actions and filters to add a custom welcome message and modify post excerpts. This hands-on example will help you understand how hooks work in practice and how you can leverage them to customize your WordPress site safely and efficiently.
What Will We Build?
- A custom plugin that:
- Adds a personalized welcome message to the site footer using an action.
- Modifies the post excerpt to include a styled “Read More” link using a filter.
- Optionally, provides a settings page in the WordPress admin so you can change the footer message without editing code.
By following these steps, you’ll learn how to:
- Structure a basic WordPress plugin.
- Use
add_actionandadd_filterto hook your functions into WordPress. - Safely output and modify data.
- Make your customizations update-safe and easy to maintain.
Let’s dive in!
Step 1: Set Up a Custom Plugin
- Navigate to
wp-content/plugins/in your WordPress installation. - Create a folder named
my-hooks-plugin. - Add a file named
my-hooks-plugin.phpwith this header:
<?php
/*
    Plugin Name: My Hooks Plugin
    Plugin URI: https://yourwebsite.com/my-hooks-plugin
    Description: A plugin to demonstrate WordPress actions and filters.
    Version: 1.0.0
    Author: Your Name
    Author URI: https://yourwebsite.com
    License: GPL2
    License URI: https://www.gnu.org/licenses/gpl-2.0.html
    Text Domain: my-hooks-plugin
*/
Explanation: This header provides WordPress with essential information about your plugin, such as its name, description, version, and author. It’s required for WordPress to recognize and manage your plugin.
Step 2: Add an Action
Add a custom welcome message to the footer using the wp_footer action. This action hook is triggered just before the closing </body> tag on every page, making it the perfect place to inject site-wide messages, scripts, or custom HTML. By hooking your function to wp_footer, you ensure your code runs at the right moment without editing theme files directly.
Here’s how you can do it:
- Use
add_actionto attach your function to thewp_footerhook. - Define your function to output the desired HTML or message.
- (Optional) Use inline styles or enqueue a stylesheet for custom appearance.
Example:
add_action( 'wp_footer', 'mhp_footer_message' );
function mhp_footer_message() {
    echo '<div class="mhp-footer" style="text-align: center; padding: 10px; background: #f1f1f1;">Welcome to my site!</div>';
}
Step 3: Add a Filter
You can customize the text that appears at the end of post excerpts in WordPress by using the excerpt_more filter. This is especially useful if you want to add a “Read More” link that directs visitors to the full post.
Here’s how you can do it in your theme’s functions.php file:
add_filter( 'excerpt_more', 'mhp_custom_excerpt_more' );
function mhp_custom_excerpt_more( $more ) {
    global $post;
    return ' <a href="' . get_permalink( $post->ID ) . '" class="read-more">Read More</a>';
}
Add CSS for styling in a new file, css/style.css, inside the plugin folder:
.read-more {
    color: #1a73e8;
    font-weight: bold;
    text-decoration: none;
}
.read-more:hover {
    text-decoration: underline;
}
Enqueue the stylesheet in my-hooks-plugin.php:
add_action( 'wp_enqueue_scripts', 'mhp_enqueue_styles' );
function mhp_enqueue_styles() {
    wp_enqueue_style( 'mhp-style', plugin_dir_url( __FILE__ ) . 'css/style.css', array(), '1.0.0' );
}
This code modifies the default excerpt behavior by appending a custom “Read More” link that points to the full post. The link is styled using CSS to match your site’s design.
Step 4: Add a Settings Page (Optional)
Create an Admin Settings Page to Customize the Footer Message
To make your plugin is more user-friendly, you can add a settings page in the WordPress admin dashboard. This allows site administrators to update the footer message without editing code.
Here’s how to do it:
-
Add a menu item under “Settings”
Use theadd_options_pagefunction to create a new settings page. -
Register a setting
Useregister_settingto store the footer message in the WordPress database. -
Add a settings section and field
Useadd_settings_sectionandadd_settings_fieldto display the input field. -
Display the settings page
Output the form usingsettings_fields,do_settings_sections, andsubmit_button.
Example:
add_action( 'admin_menu', 'mhp_add_admin_menu' );
function mhp_add_admin_menu() {
    add_options_page( 'My Hooks Plugin Settings', 'Hooks Plugin', 'manage_options', 'my-hooks-plugin', 'mhp_settings_page' );
}

add_action( 'admin_init', 'mhp_settings_init' );
function mhp_settings_init() {
    register_setting( 'mhp_options_group', 'mhp_footer_message' );
    add_settings_section( 'mhp_section', 'Plugin Settings', null, 'my-hooks-plugin' );
    add_settings_field( 'mhp_footer_message', 'Footer Message', 'mhp_footer_message_field', 'my-hooks-plugin', 'mhp_section' );
}

function mhp_footer_message_field() {
    $value = get_option( 'mhp_footer_message', 'Welcome to my site!' );
    echo '<input type="text" name="mhp_footer_message" value="' . esc_attr( $value ) . '" />';
}

function mhp_settings_page() {
    ?>
    <div class="wrap">
        <h1>My Hooks Plugin Settings</h1>
        <form method="post" action="options.php">
            <?php
            settings_fields( 'mhp_options_group' );
            do_settings_sections( 'my-hooks-plugin' );
            submit_button();
            ?>
        </form>
    </div>
    <?php
}
Update the action to use the setting:
add_action( 'wp_footer', 'mhp_footer_message' );
function mhp_footer_message() {
    $message = get_option( 'mhp_footer_message', 'Welcome to my site!' );
    echo '<div class="mhp-footer" style="text-align: center; padding: 10px; background: #f1f1f1;">' . esc_html( $message ) . '</div>';
}
Step 5: Activate and Test
Before activating your plugin, it’s important to verify that everything is set up correctly and understand what to expect. In this step, you’ll enable your custom plugin from the WordPress dashboard, then visit your site to see the new footer message and the updated “Read More” link in action. This quick test ensures your hooks are working as intended and gives you a chance to spot any issues before going live.
- Go to
Plugins > Installed Plugins, activate “My Hooks Plugin.” - Visit a post to see the custom “Read More” link in the excerpt.
- Check the footer for the welcome message.
- Test on multiple devices and with plugins like Yoast SEO for compatibility.
Step 6: Debug and Optimize
Debugging and optimizing your hook-based customizations is crucial for maintaining a stable, high-performing WordPress site. Even small mistakes in hooks can lead to unexpected behavior, errors, or performance issues. In this section, you’ll learn practical tips for troubleshooting problems, monitoring performance, and ensuring your custom code runs efficiently and safely alongside other plugins and themes.
- Enable
WP_DEBUGinwp-config.phpto catch errors:
define( 'WP_DEBUG', true );
define( 'WP_DEBUG_LOG', true );- Use Query Monitor to check performance impact.
- Test with different themes to ensure compatibility.
Pros and Cons of Using Hooks
Hooks are a cornerstone of WordPress development, but like any powerful tool, they come with both advantages and drawbacks. Understanding the pros and cons of using hooks will help you make informed decisions about when and how to use them in your projects. Below is a quick overview to help you weigh their benefits against potential challenges.
| Pros | Cons |
|---|---|
| Non-destructive customization | Requires PHP knowledge |
| Update-safe in plugins/child themes | Can cause conflicts if misused |
| Highly flexible for any feature | Debugging complex hooks can be tricky |
| Follows WordPress best practices | Overuse may impact performance |
| Modular and reusable code | Learning curve for beginners |
Common Mistakes to Avoid
Hooks are powerful, but even experienced developers can make mistakes that lead to bugs, security issues, or performance problems. By being aware of common pitfalls, you can write safer, more reliable code and avoid headaches down the road. Here are some of the most frequent mistakes to watch out for when working with WordPress hooks:
- Not Sanitizing Output: Always use
esc_htmlorsanitize_text_fieldto prevent security risks. - Incorrect Hook Names: Double-check hook names in the WordPress Codex.
- Overloading Hooks: Avoid adding heavy code to frequently called hooks like
init. - Not Testing: Test on a staging site to avoid breaking the live site.
- Ignoring Priority: Use the priority parameter (e.g.,
add_action( 'wp_footer', 'my_function', 20 )) to control execution order.
Benefits of Using Hooks
Hooks are one of the most powerful features in WordPress, enabling developers to customize and extend the platform without altering core files. By using actions and filters, you can add new functionality, modify existing behavior, and ensure your changes are update-safe. In this section, we’ll explore the key benefits of using hooks in your WordPress projects and why they’re essential for professional development.
- Flexibility: Customize nearly any aspect of WordPress.
- Safety: Keep changes update-safe in plugins or child themes.
- Efficiency: Write reusable code for multiple projects.
- Professionalism: Follow WordPress coding standards.
- Learning: Deepen your understanding of WordPress’s architecture.
WordPress hooks—actions and filters—are your ticket to unlocking the platform’s full potential. By understanding how they work and applying them in plugins or child themes, you can add custom features, modify content, and create tailored solutions without breaking your site. Start with the simple examples in this guide, and soon you’ll be hooking into WordPress like a pro. Whether you’re tweaking a blog or building for clients, hooks are a must-have skill.
Ready to try hooks? Create your first action or filter and share your results in the comments! Subscribe for more WordPress development tips.
Frequently Asked Questions
-
What’s the difference between an action and a filter in WordPress?
- Actions let you run custom code at specific points in the WordPress lifecycle (like sending an email after a post is published).
- Filters let you modify data before it’s displayed or saved (like changing a post title or excerpt).
-
Where should I add my hook code—plugin or theme?
- For site-wide or reusable functionality, use a custom plugin.
- For theme-specific tweaks, use your child theme’s
functions.php. - Avoid editing parent themes or WordPress core files.
-
How do I find available hooks in WordPress or a plugin?
- Check the WordPress Developer Reference.
- Review plugin/theme documentation.
- Use tools like Query Monitor to discover hooks running on your site.
-
Can I use multiple functions on the same hook?
- Yes! You can attach multiple functions to the same action or filter.
- Use the priority parameter to control the order in which they run.
-
What happens if I forget to return a value in a filter?
- If your filter function doesn’t return a value, the data being filtered may be lost or empty.
- Always return the modified or original value in filter callbacks.
-
Are hooks safe to use with future WordPress updates?
- Yes, as long as you use hooks in plugins or child themes and avoid editing core files, your customizations will remain update-safe.
-
Can hooks slow down my site?
- Overusing hooks or adding heavy code to frequently called hooks can impact performance.
- Keep your hook functions efficient and test for speed.
-
Can I add custom hooks for my own plugins or themes?
- Yes, you can create your own actions and filters using
do_action()andapply_filters()in your code. - This allows other developers (or yourself) to extend your plugin or theme.
- Yes, you can create your own actions and filters using
-
How do I remove a function from a hook?
- Use
remove_action()orremove_filter()with the same function name and priority used inadd_action()oradd_filter().
- Use
-
Can hooks be used for security enhancements?
- Yes, you can hook into login, registration, or comment actions to add validation, logging, or restrictions.
- Always sanitize and validate data in your hook functions.
-
Do hooks work with page builders or third-party plugins?
- Many popular plugins and page builders provide their own hooks.
- Check their documentation for available hooks and usage examples.
-
Is it possible to debug hook execution order?
- Yes, use plugins like Query Monitor or Debug Bar to inspect which hooks are running and in what order.
- You can also temporarily add logging statements in your hooked functions for troubleshooting.
Further Reading
- WordPress Plugin API
- WordPress Codex: Action Reference
- WordPress Codex: Filter Reference
- Best WordPress Development Tools
Found this guide helpful? Subscribe for weekly WordPress tutorials or share your favorite hook in the comments!