Imagine this: You’re pouring your heart into your WordPress blog, crafting posts that could change lives or sell products, but your traffic is a trickle, and nobody’s coming back. You’ve heard email marketing is the answer, but the idea of building an email list feels like scaling a mountain with no gear. Don’t worry—I’ve been there. As a WordPress enthusiast who’s helped bloggers and businesses grow their audiences, I’m here to guide you step-by-step through building a targeted email list that turns readers into loyal fans.
This beginner-friendly guide will show you how to use opt-in forms, lead magnets, and WordPress tools to grow your list without breaking a sweat. We’ll cover what an email list is, why it’s a game-changer, and exactly how to set it up with real-world examples from my own experience. Whether you’re a blogger, marketer, or small business owner, you’ll walk away with a clear plan to start collecting emails today. Let’s dive in!
Table of Contents
Open Table of Contents
Email List Overview
An email list is a collection of email addresses from people who’ve given you permission to contact them. These are your subscribers—readers, customers, or fans who’ve opted in to hear from you via newsletters, updates, or promotions. In WordPress, you build this list using tools like opt-in forms (pop-ups, sidebars, or inline forms) and lead magnets (freebies like eBooks or checklists) to entice sign-ups.
Think of your email list as a direct line to your audience. Unlike social media, where algorithms call the shots, or search traffic, which can vanish, your email list is yours to nurture and grow.
Why Build an Email List?
You might be thinking, “Why bother with emails when I’ve got Instagram or X?” Here’s why an email list is non-negotiable:
- Control: You own your list—no platform can throttle your reach.
- Engagement: Emails get 2–5% open rates on average, but targeted campaigns can hit 20% or more, blowing social media out of the water.
- Conversions: Email subscribers are 10x more likely to buy than random visitors.
- Long-Term Value: A nurtured list builds trust, turning readers into lifelong customers.
I once helped a travel blogger grow her list to 1,000 subscribers in six months. Her first email campaign sold out a $200 course in days—proof that email works.
When Should You Start Building Your List?
The short answer? Right now. Here’s why:
- New Blogs: Start collecting emails from day one, even if you only have one post. Every visitor is a potential subscriber.
- Growing Blogs: If your traffic’s climbing but engagement’s flat, an email list keeps readers coming back.
- Business Launches: Selling products or services? A list primes your audience for launches.
Don’t wait for “enough” traffic—every email counts.
Who Should Build an Email List?
This guide is for anyone with a WordPress site, including:
- Bloggers: Food, lifestyle, or niche hobbyists—emails keep your readers engaged.
- Marketers: Driving traffic to campaigns or funnels? A list is your foundation.
- Developers: Building client sites? Add email tools for extra value.
- Small Businesses: Use your blog to collect leads for products or services.
You don’t need to be a tech wizard—I’ve seen beginners nail this with the right plugins.
Where Do You Build Your Email List?
Your email list lives on your WordPress site, powered by plugins and email marketing services. You’ll:
- Add opt-in forms to your blog (pop-ups, sidebars, or footers).
- Store emails in a service like Mailchimp or ConvertKit.
- Send newsletters from that service.
Your subscribers sign up via your site, and you manage the list from your email platform’s dashboard.
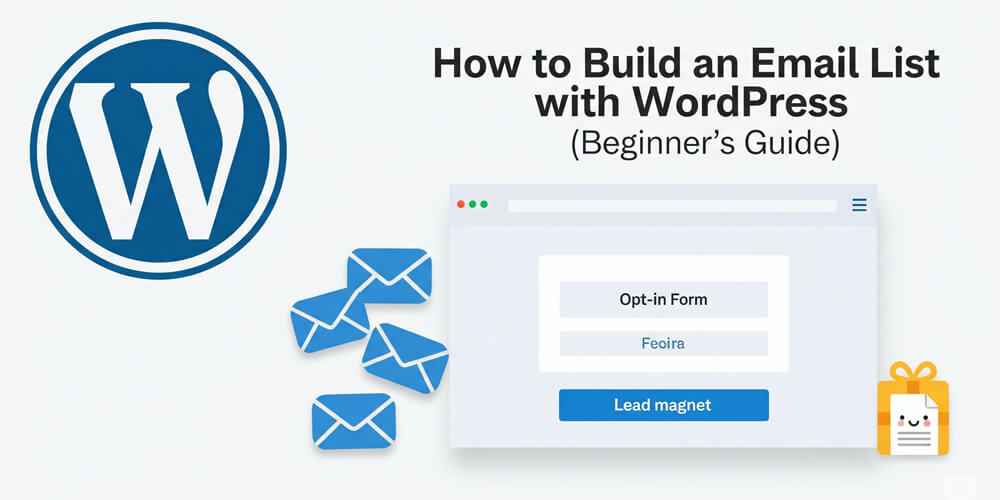
How to Build an Email List
Ready to start building your email list? In this section, I’ll walk you through a practical, step-by-step process using ConvertKit (a beginner-friendly email marketing service) and WPForms (a powerful, free WordPress form plugin). You’ll learn how to create an irresistible lead magnet, set up opt-in forms, connect everything seamlessly, and deliver your freebie automatically to new subscribers. Each step is designed for beginners—no coding required.
By the end, you’ll have a fully functional email capture system on your WordPress site, ready to turn casual visitors into loyal subscribers. Whether you’re launching a new blog or growing an existing one, these nine actionable steps will help you start collecting emails and building lasting relationships with your audience. Let’s dive in and set up your first email list the right way!
Step 1: Choose an Email Marketing Service
You need a place to store and manage your emails. Popular options include:
- ConvertKit: Beginner-friendly, with free plans for up to 1,000 subscribers.
- Mailchimp: Free for up to 2,000 contacts, but complex for newbies.
- MailerLite: Affordable and simple, with free plans for 1,000 subscribers.
For this guide, we’ll use ConvertKit—it’s intuitive and scales well.
- Sign up at convertkit.com.
- Create a free account and note your API key (found in Account Settings).
Pro Tip: Pick a service that fits your budget and list size. ConvertKit’s free plan is perfect for starters.
Step 2: Install WPForms Plugin
WPForms is a versatile form builder that integrates with ConvertKit.
- In your WordPress dashboard, go to Plugins > Add New.
- Search for “WPForms,” click Install Now, then Activate.
- Use the free version (WPForms Lite) for now—it’s enough to start.
Step 3: Connect WPForms to ConvertKit
- Go to WPForms > Addons and activate the ConvertKit addon (available in WPForms Lite).
- Navigate to WPForms > Settings > Integrations.
- Click ConvertKit, enter your API key, and save.
Step 4: Create a Lead Magnet
A lead magnet is a freebie that entices people to subscribe. Examples:
- eBook: “10 Vegan Recipes for Beginners.”
- Checklist: “Blog Launch Checklist.”
- Template: “Social Media Content Calendar.”
Create yours using Canva (for PDFs) or Google Docs. Host it on your WordPress media library or a service like Google Drive.
Example: I made a “30-Day Blog Traffic Plan” PDF for a client’s blog. It doubled her sign-ups in a month.
Step 5: Build an Opt-In Form
- Go to WPForms > Add New.
- Choose the “Newsletter Signup Form” template.
- Customize fields (e.g., Name, Email).
- Under Marketing > ConvertKit, map the form to a ConvertKit tag (e.g., “Lead Magnet Subscribers”).
- Style the form in the Settings > General tab (add a catchy title like “Grab Your Free Guide!”).
- Save and note the form’s shortcode (e.g.,
[wpforms id="123"]).
Step 6: Add the Form to Your Site
Place your form where visitors will see it:
- Sidebar: Go to Appearance > Widgets, add a “WPForms” widget, and select your form.
- Pop-Up: Use a plugin like Popup Maker (free) to create a pop-up with your form’s shortcode.
- Inline: Paste the shortcode into a post or page via the WordPress editor.
Example Shortcode:
[wpforms id="123"]Step 7: Set Up a Welcome Email
When someone subscribes, send a welcome email with your lead magnet.
- In ConvertKit, go to Automations > Create Sequence.
- Name it “Welcome Sequence.”
- Add an email:
- Subject: “Your Free [Lead Magnet Name] Is Here!”
- Body: Thank them, include a download link, and invite them to read your blog.
- Trigger the sequence when someone joins your “Lead Magnet Subscribers” tag.
Example Email:
Hi [Name],

Thanks for joining! Here’s your free [Lead Magnet Name]: [Download Link].

Check out my latest post for more tips: [Blog URL].

Happy reading,
[Your Name]
Step 8: Test Your Setup
- Visit your blog incognito and sign up via the form.
- Check if you get the welcome email and lead magnet.
- Confirm the subscriber appears in ConvertKit’s dashboard.
- Test on mobile—does the form look good?
Fix any hiccups before promoting your form.
Step 9: Promote Your Lead Magnet
Drive traffic to your opt-in form:
- Blog Posts: Add calls-to-action (e.g., “Download my free guide!”) in relevant posts.
- Social Media: Share your lead magnet on X or Instagram with a link to your sign-up page.
- Homepage: Feature the form prominently.
Example CTA:
Want to skyrocket your blog traffic? Grab my free 30-day plan now!
Real-World Use Cases
Building an email list isn’t just theory—it delivers real results for bloggers, freelancers, and business owners across every niche. By offering valuable lead magnets and using the right tools, people have grown their audiences, boosted sales, and built lasting relationships with their readers. Here are a few real-world examples to inspire you and show what’s possible when you start collecting emails on your WordPress site.
Here’s how email lists have worked for real people:
- The Fitness Blogger: She offered a “7-Day Workout Plan” PDF. Her list grew to 500 in two months, and her fitness course sold out.
- The Freelancer: He used a “Freelance Rate Calculator” lead magnet to collect 200 emails, landing three high-paying clients.
- The Foodie: Her “Quick Dinner Recipes” eBook built a 1,200-person list, driving traffic to her sponsored posts.
These folks prove a targeted list can transform your blog or business.
Pros and Cons of Email List Building
Building an email list offers powerful advantages for bloggers and business owners, but it’s not without its challenges. Before you dive in, it’s important to weigh the benefits against the drawbacks so you can set realistic expectations and avoid frustration. Here’s a quick overview of the main pros and cons to help you decide if email list building is the right strategy for your WordPress site.
| Pros | Cons |
|---|---|
| High ROI (conversions) | Takes time to grow |
| Full control over audience | Requires ongoing content creation |
| Affordable tools (free plans) | Risk of low open rates if mismanaged |
| Builds long-term relationships | Learning curve for beginners |
Common Mistakes to Avoid
Before you dive in, it’s important to know that even well-intentioned bloggers can make mistakes when building an email list. Avoiding common pitfalls will save you time, protect your reputation, and help you grow your list faster. In this section, I’ll highlight the most frequent missteps beginners make—so you can sidestep them and set yourself up for success.
I’ve seen beginners trip up—steer clear of these:
- No Lead Magnet: Asking for emails without a reward flops. Offer value.
- Spammy Emails: Too many or irrelevant emails lead to unsubscribes. Stick to 1–2 per week.
- Bad Design: Clunky forms scare users off. Keep them clean and mobile-friendly.
- Ignoring Analytics: Track open and click rates to refine your emails.
- No HTTPS: Forms need SSL for security. Get a free certificate via Let’s Encrypt.
- Not Testing: Always test your forms and emails before going live.
- Overcomplicating: Don’t ask for too much info upfront. Keep it simple—name and email are enough.
- Neglecting Mobile: Ensure forms look good on phones—most traffic is mobile now.
- Not Segmenting: Use tags in ConvertKit to group subscribers by interest. This helps you send targeted emails.
- Ignoring GDPR: If you have EU visitors, comply with GDPR by adding a consent checkbox.
- Not Following Up: Don’t leave subscribers hanging. Send a welcome email immediately after sign-up.
- Forgetting to Clean Your List: Regularly remove inactive subscribers to keep your list healthy.
- Not Using A/B Testing: Experiment with different subject lines and content to see what resonates.
- Not Asking for Feedback: Use surveys to understand what your audience wants. This helps you create better content and lead magnets.
- Not Using a Double Opt-In: This ensures subscribers really want your emails. It reduces spam complaints and improves engagement.
- Not Personalizing Emails: Use the subscriber’s name in emails to make them feel special. Personalization increases open rates.
- Not Using Clear CTAs: Make it easy for subscribers to take action. Use buttons and clear language in your emails.
Benefits and Key Takeaways
Building an email list with WordPress offers a range of benefits that can transform your blog or business. Whether you’re aiming to boost engagement, increase sales, or simply stay connected with your audience, having a direct line to your readers is invaluable. Below are some of the key advantages and takeaways to keep in mind as you start or grow your email list.
Building an email list with WordPress:
- Drives Repeat Traffic: Subscribers visit your blog regularly.
- Boosts Sales: Turn readers into buyers with targeted campaigns.
- Builds Trust: Nurture relationships over time.
- Low Cost: Free tools like ConvertKit and WPForms make it accessible.
Key Takeaway: An email list is your blog’s superpower—start small, offer value, and watch it grow.
Building an email list with WordPress is easier than it sounds. With a solid lead magnet, a simple form, and a service like ConvertKit, you can start collecting emails today and turn casual readers into raving fans. Test your setup, promote your freebie, and keep your emails valuable. Before you know it, your list will be your blog’s biggest asset.
Don’t wait for the perfect moment—launch your first opt-in form now. Got questions or a cool lead magnet idea? Share in the comments—I’m all ears!
Further Reading
Want more WordPress tips? Subscribe for weekly insights, or let me know what you’re working on below!
FAQ
Q: Do I need a big blog to start an email list?
A: Nope! Even one visitor can become a subscriber—start now.
Q: Are free email services good enough?
A: Yes, ConvertKit or MailerLite’s free plans work great for beginners.
Q: How often should I email my list?
A: 1–2 times per week is ideal—keep it valuable to avoid unsubscribes.
Q: What makes a good lead magnet?
A: Something your audience wants (e.g., a guide, checklist) that solves a specific problem.
Q: Can I use pop-ups without annoying visitors?
A: Yes—delay them by 10 seconds and use an exit-intent trigger.