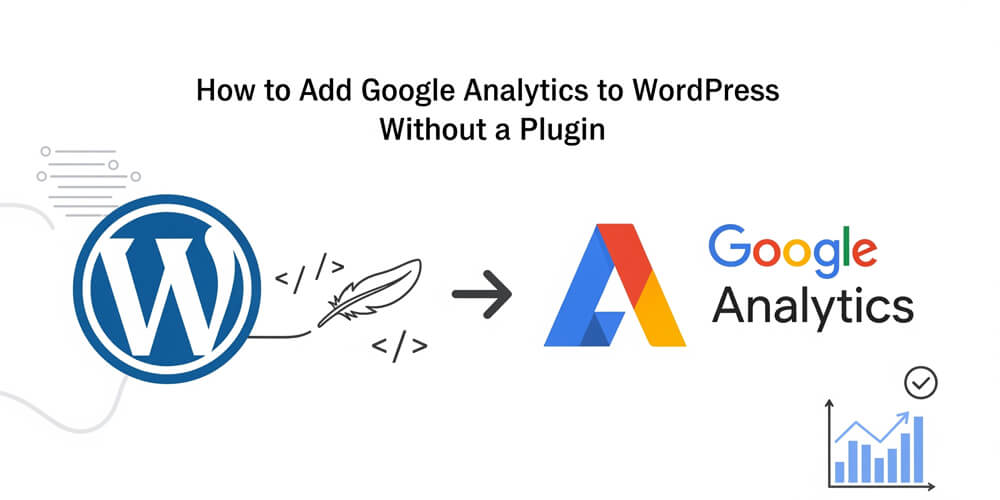
If you’re running a WordPress site, understanding your audience is key to growth. Google Analytics is the gold standard for tracking visitor behavior, but many WordPress users default to plugins for integration. While plugins are convenient, they can bloat your site, slow it down, or even break during updates. Adding Google Analytics manually is a lightweight, reliable alternative that gives you full control.
As a WordPress developer with years of experience optimizing sites for clients, I’ve seen the benefits of going plugin-free for analytics tracking. In this guide, I’ll walk you through the process of manually adding Google Analytics to your WordPress site. Whether you’re a blogger, marketer, or developer, this tutorial will help you set up tracking without the overhead of plugins.
Table of Contents
Open Table of Contents
What is Google Analytics?
Google Analytics is a free tool that tracks website traffic, user behavior, and performance metrics like page views, bounce rates, and conversions. It’s essential for understanding how visitors interact with your WordPress site.
Why Add Google Analytics Without a Plugin?
Plugins like MonsterInsights or Analytify are popular, but they come with downsides:
- Bloat: Plugins add extra code, which can slow your site.
- Dependency: Updates or compatibility issues can break tracking.
- Control: Manual integration lets you customize tracking exactly how you want.
When Should You Add It?
Add Google Analytics as soon as your site is live or during development to start collecting data. It’s particularly useful when launching a blog, e-commerce store, or portfolio site.
Who Should Use This Method?
This guide is for:
- WordPress users comfortable editing theme files.
- Developers seeking lightweight solutions.
- Bloggers or marketers avoiding plugin overload.
Where Does the Code Go?
You’ll add Google Analytics code to your WordPress theme’s header or footer, typically via the functions.php file or a child theme.
How Does It Work?
Google Analytics provides a JavaScript snippet that you embed in your site’s code. This snippet tracks user interactions and sends data to your Google Analytics dashboard.
Step-by-Step Guide to Adding Google Analytics to WordPress
Here’s how to manually integrate Google Analytics into your WordPress site. Follow these steps carefully to ensure accurate tracking.
Step 1: Set Up Google Analytics
-
Create a Google Analytics Account:
- Go to analytics.google.com.
- Sign in with your Google account and click “Start Measuring.”
- Set up a property for your website, choosing “Web” as the platform.
-
Get Your Tracking ID or Measurement ID:
- After setup, you’ll receive a Tracking ID (e.g.,
UA-12345678-1) for Universal Analytics or a Measurement ID (e.g.,G-XXXXXXXXXX) for Google Analytics 4 (GA4). - Copy this ID. You’ll need it for the next steps.
- After setup, you’ll receive a Tracking ID (e.g.,
Step 2: Access Your WordPress Theme Files
-
Log in to WordPress:
- Navigate to your WordPress dashboard.
- Go to Appearance > Theme File Editor or use an FTP client like FileZilla for safer editing.
-
Create a Child Theme (Optional but Recommended):
- Editing your theme directly risks losing changes during updates. A child theme preserves your customizations.
- Create a child theme using a plugin like Child Theme Configurator or manually:
- Create a new folder in
wp-content/themes/(e.g.,mytheme-child). - Add a
style.cssfile with:/* Theme Name: My Theme Child Template: parent-theme-folder-name */ - Add a
functions.phpfile for custom code.
- Create a new folder in
Step 3: Add Google Analytics Code to WordPress
There are two common methods to add the tracking code: via the theme’s header or through the functions.php file.
Method 1: Add to Header (header.php)
- Locate header.php:
- In the Theme File Editor, find
header.phpunder your active theme (or child theme).
- In the Theme File Editor, find
- Paste the Tracking Code:
- For GA4, use this snippet (replace
G-XXXXXXXXXXwith your Measurement ID):<!-- Google Analytics --> <script async src="https://www.googletagmanager.com/gtag/js?id=G-XXXXXXXXXX"></script> <script> window.dataLayer = window.dataLayer || []; function gtag(){dataLayer.push(arguments);} gtag('js', new Date()); gtag('config', 'G-XXXXXXXXXX'); </script> <!-- End Google Analytics --> - Paste this code just before the closing
</head>tag.
- For GA4, use this snippet (replace
- Save Changes:
- Click “Update File” and verify the code is live by viewing your site’s source code (Ctrl+U in Chrome).
Method 2: Add via functions.php
-
Edit functions.php:
- In the Theme File Editor, open
functions.phpin your child theme.
- In the Theme File Editor, open
-
Add the Tracking Code:
- Use this PHP code to inject the tracking script into the
<head>section:add_action('wp_head', 'add_google_analytics'); function add_google_analytics() { ?> <!-- Google Analytics --> <script async src="https://www.googletagmanager.com/gtag/js?id=G-XXXXXXXXXX"></script> <script> window.dataLayer = window.dataLayer || []; function gtag(){dataLayer.push(arguments);} gtag('js', new Date()); gtag('config', 'G-XXXXXXXXXX'); </script> <!-- End Google Analytics --> <?php } - Replace
G-XXXXXXXXXXwith your Measurement ID.
- Use this PHP code to inject the tracking script into the
-
Save and Test:
- Save the file and check your site’s source code to confirm the script appears.
Step 4: Verify Tracking
- Check Real-Time Reports:
- In Google Analytics, go to Reports > Real-Time and visit your site to see if your activity is tracked.
- Use Google Tag Assistant:
- Install the Google Tag Assistant Chrome extension to verify the tracking code is firing correctly.
Real-World Use Cases
- Bloggers: Track which posts drive the most traffic to optimize content strategies. For example, I helped a travel blogger manually add GA4 to their WordPress site, revealing that their “budget travel tips” posts had a 40% higher engagement rate than others.
- E-Commerce Stores: Monitor product page views and conversion funnels. A client running a WooCommerce store used manual GA4 integration to track add-to-cart events without plugin conflicts.
- Portfolio Sites: Measure visitor demographics to tailor content. A freelance designer used manual tracking to discover most visitors were from mobile devices, prompting a mobile-first redesign. I also use this for my own portfolio site to track which projects attract the most interest.
- Nonprofits: Track donation page performance and user engagement. A nonprofit I worked with used manual integration to analyze which campaigns drove the most donations, allowing them to focus their efforts effectively.
- Local Businesses: Understand customer behavior on service pages. A local restaurant used GA4 to track how many visitors clicked on their online reservation system, leading to a 25% increase in bookings.
Pros and Cons of Manual Integration
| Pros | Cons |
|---|---|
| Lightweight, no plugin bloat | Requires basic coding knowledge |
| Full control over tracking code | Risk of errors if code is misconfigured |
| No dependency on plugin updates | Manual updates needed for tracking ID changes |
| Works with any WordPress theme | Not ideal for complete beginners |
Common Mistakes to Avoid
- Incorrect Measurement ID: Double-check your ID to avoid tracking the wrong property.
- Editing Parent Theme Directly: Always use a child theme to prevent losing changes during updates.
- Placing Code in Wrong Location: Ensure the script is in the
<head>section, not the<body>. - Not Testing: Always verify tracking with real-time reports or Tag Assistant.
- Ignoring GDPR Compliance: If your site serves EU visitors, add a cookie consent banner to comply with GDPR.
- Not Using Anonymized IP: For GDPR compliance, add
{ 'anonymize_ip': true }to yourgtag('config')call. - Overlooking Event Tracking: If you need custom event tracking (e.g., button clicks), plan this in advance to avoid re-editing the code.
- Neglecting Site Speed: Monitor your site’s performance after adding the script to ensure it doesn’t slow down loading times.
- Not Using a Backup: Always back up your site before making changes to theme files.
- Forgetting to Update Tracking ID: If you change properties in Google Analytics, remember to update the ID in your code.
Comparison between Plugins and Manual Integration
| Feature | Manual Integration | Plugins (e.g., MonsterInsights) |
|---|---|---|
| Ease of Use | Requires coding | User-friendly, no coding needed |
| Performance | Lightweight, no extra scripts | Adds scripts, may slow site |
| Customization | Full control over code | Limited by plugin options |
| Cost | Free | Free or premium versions |
| Maintenance | Manual updates | Automatic updates, but risk of breaking |
Plugins are great for beginners, but manual integration is better for performance-conscious users or those with custom tracking needs.
Benefits and Key Takeaways
- Performance: Manual integration reduces site bloat, improving load times.
- Control: Customize tracking for specific goals, like e-commerce or event tracking.
- Reliability: Avoid plugin conflicts or update issues.
- Cost-Free: No need for premium plugin subscriptions.
Key Takeaway: Manually adding Google Analytics to WordPress is a straightforward, efficient way to track your site’s performance without sacrificing speed or control.
SEO and Performance Considerations
Before diving into the technical steps, it’s important to understand how Google Analytics can impact your site’s SEO and performance. This section covers what you need to know about analytics scripts, their effect on site speed, privacy considerations, and how to ensure your tracking setup supports your SEO goals.
- SEO Impact: Google Analytics doesn’t directly affect SEO, but the insights it provides can help optimize content for better rankings. For example, identifying high-bounce-rate pages can guide content improvements.
- Performance: The GA4 script is lightweight (about 40KB), but ensure your site is optimized with caching (e.g., WP Rocket) and a CDN (e.g., Cloudflare) to minimize load time impact.
- Privacy: Use anonymized IP tracking in GA4 for GDPR compliance (
gtag('config', 'G-XXXXXXXXXX', { 'anonymize_ip': true });).
Adding Google Analytics to WordPress without a plugin is a smart choice for anyone prioritizing performance and control. By following the steps above—setting up your Google Analytics account, adding the tracking code to your theme, and verifying functionality—you can start collecting valuable data in minutes. This method is reliable, lightweight, and perfect for WordPress users who want to avoid plugin bloat.
Whether you’re a blogger tracking post performance or an e-commerce owner analyzing conversions, manual integration empowers you to tailor analytics to your needs. Take the time to set it up correctly, and you’ll unlock insights that drive growth.
Further Reading
- Google Analytics 4 Setup Guide – Official guide to setting up GA4.
- Google Analytics Academy – Free courses to master Google Analytics.
- Child Themes – Theme Handbook | Developer.WordPress.org – Official guide to creating child themes.
- Google Tag Manager vs. Google Analytics – Understand when to use GTM for advanced tracking.
- GDPR Compliance for Google Analytics – Ensure your tracking is compliant with EU regulations.
FAQ
-
Can I use this method with Google Tag Manager?
Yes, you can replace the GA4 script with a Google Tag Manager (GTM) container code. Follow the same steps, but paste the GTM script instead. -
Will manual integration work with all WordPress themes?
Yes, as long as your theme has aheader.phpor supports thewp_headhook, this method works universally. -
How do I know if Google Analytics is tracking correctly?
Use the Real-Time reports in Google Analytics or the Google Tag Assistant Chrome extension to confirm tracking is active. -
Is manual integration GDPR-compliant?
By default, Google Analytics collects IP addresses. Add{ 'anonymize_ip': true }to yourgtag('config')call and use a cookie consent plugin to ensure GDPR compliance. -
Can I add custom events without plugins?
Yes, you can add custom events by extending the GA4 script withgtag('event', 'event_name', { ... }). Refer to Google’s documentation for details.