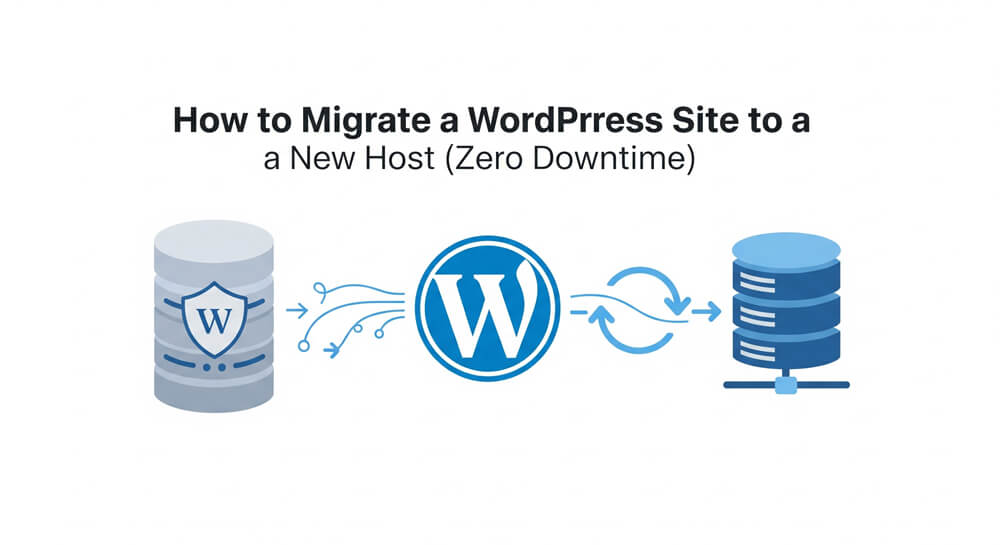
Moving your WordPress site to a new host can feel like relocating your entire house—exciting but nerve-wracking, with a million things that could go wrong. Maybe your current host is slow, pricey, or just not cutting it, and you’re ready for a better home for your blog, store, or portfolio. As a WordPress enthusiast who’s migrated dozens of sites for clients and personal projects, I can assure you it’s totally manageable, even if you’re new to this. With the right steps, you can switch hosts without downtime or broken links.
In this beginner-friendly guide, I’ll walk you through migrating your WordPress site to a new host using plugins and manual methods, ensuring zero downtime. We’ll cover what migration involves, why it’s worth doing, and a step-by-step plan with real-world tips from my own experience. By the end, your site will be thriving on its new host, faster and stronger than ever. Let’s dive in!
Table of Contents
Open Table of Contents
- What Is WordPress Site Migration?
- How to Migrate a WordPress Site
- Real-World Use Cases
- Pros and Cons of Migration Methods
- Common Mistakes to Avoid
- Duplicator vs. Alternatives
- FAQ
- Further Reading
What Is WordPress Site Migration?
Migrating a WordPress site means transferring your website’s files, database, and settings from one hosting provider to another. This includes everything that makes your site tick: themes, plugins, posts, pages, media, and configurations. The goal is to replicate your site on the new host exactly as it was, without losing data or interrupting visitor access.
Migration can be done manually (copying files and databases) or with plugins like Duplicator or All-in-One WP Migration, which simplify the process. The key is ensuring your site stays live during the switch, which we’ll achieve with careful planning.
Why Migrate to a New Host?
Switching hosts can transform your site’s performance and your experience as a site owner. Here’s why people migrate:
- Better Performance: Faster hosts like SiteGround or WP Engine improve load times and SEO.
- Lower Costs: Some hosts offer better value (e.g., Hostinger’s budget plans).
- Improved Support: Responsive customer service saves headaches.
- Advanced Features: Need staging sites, better backups, or scalability? A new host might deliver.
- Reliability: Say goodbye to frequent downtime or server crashes.
When Should You Migrate?
Timing your migration depends on your needs:
- Slow Site: If load times are hurting user experience or SEO, move now.
- Downtime Issues: Frequent outages? Don’t wait—switch to a reliable host.
- Cost Savings: Found a better deal? Migrate before your current plan renews.
- Scaling Up: Growing traffic or adding features? Upgrade to a host that supports growth.
- New Projects: Starting fresh with a better host saves future hassle.
Plan migrations during low-traffic periods (e.g., late at night) to minimize impact, even though we’re aiming for zero downtime.
How to Migrate a WordPress Site
Migrating your WordPress site may sound daunting, but with the right approach, it’s a straightforward process that anyone can handle. Whether you prefer an automated plugin or a hands-on manual method, you can move your site safely and efficiently. Below, I’ll guide you through two proven migration techniques—each designed to minimize risk and keep your website online throughout the transition.
Before You Start: Preparation
Before diving into the migration process, it’s important to lay the groundwork for a smooth transition. Proper preparation ensures you have everything you need at your fingertips and reduces the risk of unexpected issues. In this section, we’ll cover the essential steps to get ready for migration—choosing your new host, backing up your site, and gathering the necessary credentials—so you can move forward with confidence.
- Choose a New Host: Pick a reliable provider like SiteGround, Bluehost, or Hostinger.
- Get Access: Ensure you have login details for both old and new hosts (cPanel, FTP, or dashboard).
- Backup Everything: Use UpdraftPlus to back up your site on the old host. Store the backup off-server (e.g., Google Drive).
- Check Domain Registrar: Know where your domain is registered (e.g., GoDaddy, Namecheap) for DNS updates.
- Test New Host: Sign up for the new host but don’t update DNS yet to avoid downtime.
Method 1: Migrate with Duplicator Plugin (Automated)
Migrating your WordPress site with the Duplicator plugin is one of the easiest and most reliable ways to move everything—files, database, themes, and plugins—to a new host. This method is ideal for beginners and site owners who want a streamlined, mostly automated process with minimal technical steps. Below, you’ll learn how to use Duplicator to create a complete backup of your site and restore it on your new hosting provider.
Step 1: Install Duplicator on the Old Host
- Log into your WordPress dashboard on the old host (
https://yoursite.com/wp-admin). - Go to Plugins > Add New, search for “Duplicator,” and click Install Now, then Activate.
Step 2: Create a Migration Package
- Go to Duplicator > Packages > Create New.
- Name the package (e.g., “Site Migration 2025”).
- Leave default settings unless you have specific needs (e.g., exclude large files).
- Click Next, let Duplicator scan your site, then click Build.
- Download two files: the Archive (
.zip) and the Installer (installer.php).
Step 3: Upload Files to the New Host
- Log into the new host’s cPanel or FTP.
- Navigate to the
public_htmldirectory (or a subfolder likepublic_html/blog). - Upload the Archive and Installer files via File Manager or FileZilla.
- Create a new MySQL database in cPanel:
- Go to MySQL Databases, create a database (e.g.,
new_wp_db). - Add a user (e.g.,
new_wp_user) with a strong password and All Privileges. - Note the database name, username, and password.
- Go to MySQL Databases, create a database (e.g.,
Step 4: Run the Duplicator Installer
- Visit
https://newhostdomain.com/installer.php(replace with your domain or temporary URL). - Follow the wizard:
- Step 1: Accept terms.
- Step 2: Enter database details (name, user, password; host is usually
localhost). - Step 3: Update URLs if needed (e.g., from old domain to new).
- Step 4: Log in to the new WordPress dashboard.
- Save permalinks (Settings > Permalinks > Save Changes).
- Delete the Duplicator files from the new host (for security).
- Check for any broken links or missing images.
- If you have SSL, install a free certificate via cPanel or use Cloudflare for HTTPS.
Step 5: Test the New Site
Before making your site live on the new host, it’s crucial to thoroughly test everything to ensure a seamless transition. Testing helps you catch any issues—like missing images, broken links, or plugin conflicts—before visitors notice. This step ensures your website looks and works exactly as it did on the old host, giving you confidence to proceed with the DNS update and complete your migration without surprises.
- Access the new site via the host’s temporary URL (e.g.,
http://newhost-ip/~username). - Check posts, pages, images, and plugins—everything should match the old site.
- Test forms, comments, and eCommerce features if applicable.
Method 2: Manual Migration (Full Control)
Manual migration involves copying files and the database yourself. It’s more technical but gives you complete control.
If you want to understand exactly what’s happening during your site move—or if plugins aren’t an option—manual migration is the way to go. This method is ideal for advanced users, large or complex sites, or situations where plugin-based tools fail. You’ll handle every step directly, ensuring nothing is missed and your site works perfectly on the new host.
Step 1: Back Up Files and Database
- Files:
- Connect to the old host via FTP (FileZilla) or cPanel’s File Manager.
- Download the entire
public_htmldirectory (or your WordPress folder) to your computer.
- Database:
- In cPanel, go to phpMyAdmin.
- Select your WordPress database, click Export, choose SQL format, and download.
- Save the
.sqlfile locally.
Step 2: Upload Files to the New Host
- Connect to the new host via FTP or File Manager.
- Upload the
public_htmlfiles to the new server’spublic_htmldirectory. - Wait for the upload (5–15 minutes, depending on site size).
Step 3: Import the Database
- In the new host’s cPanel, create a new MySQL database and user (as in Method 1).
- Go to phpMyAdmin, select the new database, and click Import.
- Upload the
.sqlfile from the old host and click Go.
Step 4: Update wp-config.php
- Open the
wp-config.phpfile in the new host’spublic_htmldirectory. - Update the database details:
define('DB_NAME', 'new_wp_db'); define('DB_USER', 'new_wp_user'); define('DB_PASSWORD', 'your_password'); define('DB_HOST', 'localhost'); - Save and upload the file.
Step 5: Test the New Site
- Use the new host’s temporary URL to view the site.
- Verify all content, settings, and functionality.
- Fix any issues (e.g., missing images, broken links).
- If you have SSL, install a free certificate via cPanel or use Cloudflare for HTTPS.
- Update permalinks (Settings > Permalinks > Save Changes).
- Install a security plugin like Wordfence and run a scan.
- If you have a caching plugin, clear the cache.
- If you have a CDN (e.g., Cloudflare), update the settings to point to the new host.
- If you have a custom domain, update the DNS settings (see Step 6).
Step 6: Update DNS for Zero Downtime
Switching your domain’s DNS is the final step to make your migrated site live on the new host. This process can seem intimidating, but with careful timing and the right approach, you can ensure your visitors experience zero downtime. In this section, you’ll learn how to update your DNS records safely, minimize disruption, and keep your website accessible throughout the transition.
To switch hosts without downtime:
- Lower TTL: In your domain registrar (e.g., Namecheap), set your domain’s TTL (Time to Live) to 300 seconds a few hours before the switch.
- Update DNS: Change the A record or nameservers to point to the new host:
- A Record: Update to the new host’s IP address (found in cPanel).
- Nameservers: Use the new host’s nameservers (e.g.,
ns1.siteground.net).
- Wait for DNS propagation (1–24 hours, usually faster).
- Keep the old host active during propagation to avoid downtime.
Step 7: Final Checks
- Visit your site (
https://yoursite.com) after DNS propagates. - Log into the WordPress dashboard and test all features.
- Update permalinks (Settings > Permalinks > Save Changes).
- Install a security plugin like Wordfence and run a scan.
- Cancel the old hosting plan (after confirming everything works).
Real-World Use Cases
Here’s how migrations have helped real people and organizations unlock new potential for their WordPress sites:
-
The Lifestyle Blogger: Frustrated by slow load times and frequent downtime on a budget host, she decided to migrate her site to SiteGround using the Duplicator plugin. The process was smooth and beginner-friendly—she followed the step-by-step package creation and restoration, and within an hour, her site was live on the new host. The results were immediate: her homepage loaded twice as fast, bounce rates dropped, and she climbed several spots in Google search rankings for her main keywords. She also noticed fewer support headaches and more time to focus on content.
-
The eCommerce Store: A client running a WooCommerce shop with over 1,000 products faced sluggish performance and checkout errors during traffic spikes. We opted for a manual migration to WP Engine for maximum control and reliability. By carefully copying files, exporting/importing the database, and testing on a staging URL, we ensured every product, order, and plugin worked perfectly before updating DNS. The transition was seamless—customers never saw downtime, and the store’s conversion rate jumped by 20% thanks to faster pages and a smoother checkout experience.
-
The Nonprofit Organization: Operating on a tight budget, this nonprofit needed to cut hosting costs without disrupting their critical donation form. Using the All-in-One WP Migration plugin, they moved from an expensive legacy host to Hostinger. The migration was completed in under an hour, and by lowering the DNS TTL and timing the switch during off-peak hours, their donation system stayed live throughout. The savings allowed them to invest more in outreach, and their new host’s improved uptime meant supporters could always access their site.
-
The Agency Portfolio: A web design agency managing multiple client sites used a combination of Duplicator and manual methods to consolidate sites onto a single, high-performance VPS. By planning migrations during weekends and leveraging temporary URLs for testing, they avoided client disruptions. The agency now enjoys easier management, lower costs, and happier clients thanks to faster, more reliable hosting.
These real-world stories highlight that, with the right approach and tools, WordPress migration can deliver major improvements in speed, reliability, SEO, and cost savings—without the stress or downtime many fear. Whether you’re a solo blogger, a business owner, or an agency, a well-executed migration can be a true game-changer.
Pros and Cons of Migration Methods
Migrating a WordPress site can be accomplished in several ways, each with its own advantages and trade-offs. Choosing the right method depends on your technical comfort level, site size, and specific needs. Below is a comparison table outlining the pros and cons of popular migration methods, helping you decide which approach best fits your situation.
| Method / Feature | Ease of Use | Automation | File Size Limit | Cost | Control | Best For |
|---|---|---|---|---|---|---|
| Duplicator | Easy | Yes | ~500MB (Free), Unlimited (Pro) | Free / Pro ($69+) | Moderate | Most users, small/medium sites |
| Manual Migration | Hard | No | None | Free | Full | Advanced users, large sites |
| All-in-One WP Migration | Very Easy | Yes | 512MB (Free), Unlimited (Pro) | Free / Pro ($69+) | Low | Beginners, small sites |
| UpdraftPlus | Moderate | Yes | Unlimited (with Pro) | Free / Pro ($70+/yr) | Moderate | Backups & migrations, cloud storage |
| WP Migrate DB Pro | Moderate | Partial | Unlimited | Pro ($99+/yr) | Database only | Developers, database sync |
| Host’s Free Migration | Easiest | Yes | Varies | Free (with host) | Low | Non-technical users, simple sites |
| WP-CLI | Hard | Yes (scripts) | None | Free | Full | Developers, automation |
Common Mistakes to Avoid
Migrating a WordPress site can be smooth if you follow the right steps, but there are common pitfalls that can cause headaches or even downtime. Being aware of these mistakes ahead of time will help you avoid unnecessary stress and ensure a seamless transition to your new host. Here are some of the most frequent errors people make during migration—and how to steer clear of them:
- No Backup: Always back up before migrating. One wrong move can wipe your site.
- Skipping Tests: Don’t update DNS until you’ve tested the new site thoroughly.
- Wrong wp-config.php: Incorrect database details break the site. Double-check.
- Premature DNS Change: Changing DNS too early causes downtime. Use temporary URLs first.
- Forgetting SSL: Ensure HTTPS is active on the new host to avoid security warnings.
Duplicator vs. Alternatives
When considering how to migrate your WordPress site, it’s important to compare Duplicator with other popular migration tools. Each tool offers unique features, limitations, and ease of use, making some better suited for certain scenarios than others. In this section, we’ll briefly highlight how Duplicator stacks up against its main alternatives, so you can choose the best fit for your needs.
Other migration tools include:
- All-in-One WP Migration: Free, super simple, but limited to 512MB unless you pay ($69+).
- UpdraftPlus: Great for backups and migrations, with cloud storage integration ($70+/year for premium).
- WP Migrate DB Pro: Ideal for developers, focuses on database migration ($99+/year).
Duplicator is best for free, all-in-one migrations; All-in-One WP Migration is easier for small sites; manual is king for control.
Migrating your WordPress site to a new host is like moving to a better neighborhood—your site gets a fresh start with improved speed, reliability, and features. Whether you use Duplicator’s automation or the manual method’s control, you can achieve zero downtime with careful planning. Back up everything, test thoroughly, and update DNS strategically. Your site will thank you with better performance and happier visitors.
Don’t let a sluggish host hold you back—migrate today and unlock your site’s potential. Got questions or a migration story? Drop them in the comments—I’d love to hear!
FAQ
Q: How long does it take to migrate a WordPress site?
A: Duplicator takes 20–40 minutes; manual takes 30–60 minutes, plus DNS propagation (1–24 hours).
Q: Will my site go offline during migration?
A: Not if you test on the new host first and keep the old host active during DNS propagation.
Q: Do I need technical skills?
A: Duplicator is beginner-friendly; manual migration requires basic FTP and database knowledge.
Q: Can I migrate a large site with Duplicator?
A: Free Duplicator works for most sites, but large sites (500MB+) may need Duplicator Pro.
Q: What if something breaks?
A: Restore your backup on the old host and check your steps. Contact your new host’s support for help.
Further Reading
Loved this guide? Subscribe for more WordPress tips, or share your migration plans below!