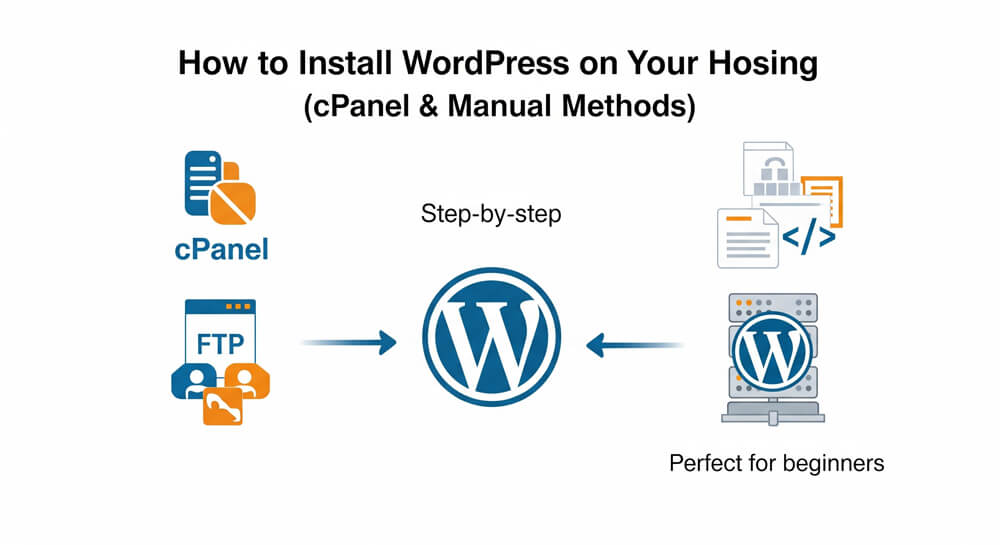
Starting a WordPress site feels like launching a rocket—exciting, a bit daunting, but totally doable with the right steps. Whether you’re dreaming of a blog that goes viral, an online store, or a portfolio to showcase your work, it all begins with installing WordPress on your hosting. As someone who’s set up dozens of WordPress sites for clients and personal projects, I can tell you it’s simpler than it looks, even if you’re new to this.
In this beginner-friendly guide, I’ll walk you through two ways to install WordPress: the super-easy cPanel method and the hands-on manual method. We’ll cover what WordPress installation involves, why it’s worth doing right, and a step-by-step plan with real-world tips from my own experience. By the end, you’ll have your site up and running, ready to conquer the web. Let’s get started!
Table of Contents
Open Table of Contents
WordPress Installation Overview
Installing WordPress means setting up the WordPress software on your web hosting server so you can create and manage a website. WordPress is a content management system (CMS) that powers over 40% of the web, from blogs to eCommerce stores. Installation involves uploading WordPress files, creating a database, and configuring settings to connect everything.
You can install WordPress using automated tools (like cPanel’s one-click installers) or manually by uploading files and configuring them yourself. Both methods get you to the same place: a fresh WordPress site ready for customization.
Why Install WordPress on your own?
If you’re wondering why you should bother installing WordPress yourself instead of using a website builder or hiring someone, you’re not alone. Taking control of your own installation gives you more flexibility, ownership, and understanding of how your site works. Plus, it’s a valuable skill that can save you money and help you troubleshoot issues down the road.
Why go through the setup? Here’s what makes WordPress a no-brainer:
- Flexibility: Build anything—blogs, portfolios, stores, or forums—with one platform.
- Ease of Use: No coding needed; the dashboard is beginner-friendly.
- Customization: Thousands of themes and plugins let you tailor your site.
- Community: A massive support network, tutorials, and forums are at your fingertips.
When Should You Install WordPress?
Timing depends on your goals:
- New Projects: Starting a blog, business site, or portfolio? Install now to hit the ground running.
- Site Revamps: Upgrading from a static site or another platform? WordPress is the way to go.
- Testing Ideas: Want to experiment with a niche blog? Install WordPress to test the waters.
- Client Work: Developers, set up WordPress for clients to deliver a scalable solution.
Don’t wait for the “perfect” moment—installing takes under an hour, and you can tweak as you go.
Who Should Install WordPress?
This guide is for anyone ready to launch a site, including:
- Bloggers: Share your passion with a personal or niche blog.
- Marketers: Build landing pages or content hubs for campaigns.
- Developers: Create client sites with a robust CMS.
- Small Businesses: Set up a professional site for services or products.
No tech expertise required—I’ve seen complete newbies master this with the right guidance.
Where Do You Install WordPress?
WordPress gets installed on your web hosting server, which you access via a control panel (like cPanel) or file transfer tools (like FTP). You’ll need:
- Hosting: A web host like SiteGround, Bluehost, or Hostinger.
- Domain: A web address (e.g.,
yoursite.com). - Tools: cPanel for automation or FTP/database access for manual setup.
Your site lives on the hosting server, and you manage it through the WordPress dashboard after installation.
How to Install WordPress: Step-by-Step Guide
Before diving into the technical steps, it’s important to know that installing WordPress is easier than it sounds—no advanced skills required. Whether you prefer a fast, automated setup or want to understand every detail by doing it manually, both approaches are accessible to beginners. Choose the method that fits your comfort level and hosting setup.
Let’s install WordPress! I’ll cover two methods: the quick cPanel method (perfect for beginners) and the manual method (great for control freaks like me). Follow along, and you’ll have a live site in no time.
Method 1: Install WordPress via cPanel (Automated)
If you want the quickest and easiest way to install WordPress, using cPanel’s automated installer is your best bet. This method is ideal for beginners and anyone who wants to get a site online with minimal hassle. You don’t need any technical skills—just follow a few prompts, and your WordPress site will be ready in minutes.
Most hosting providers offer cPanel with one-click installers like Softaculous or Installatron. This is the fastest way to get started.
Step 1: Log into cPanel
- Access your hosting account (check your welcome email for login details).
- Find the cPanel link (usually at
yourdomain.com/cpanelor via your host’s dashboard). - Log in with your username and password.
Step 2: Find the WordPress Installer
- In cPanel, scroll to the Software or Web Applications section.
- Look for “Softaculous Apps Installer,” “WordPress Manager,” or “Installatron.”
- Click the WordPress icon to start the installer.
Step 3: Configure Installation Settings
- Click Install Now in Softaculous.
- Fill in the details:
- Choose Protocol: Select
https://(ensure SSL is active). - Choose Domain: Pick your domain (e.g.,
yoursite.com). - In Directory: Leave blank for the main site (
yoursite.com) or enter a folder (e.g.,blogforyoursite.com/blog). - Site Name: Enter your site’s name (e.g., “My Awesome Blog”).
- Site Description: Add a tagline (e.g., “Tips for Better Living”).
- Admin Username: Choose something secure (not “admin”).
- Admin Password: Use a strong password (e.g., “X7p#9mQz!”).
- Admin Email: Enter your email for notifications.
- Choose Protocol: Select
- Leave other settings (like database name) as default unless you have specific needs.
- Click Install.
Step 4: Verify Installation
- Wait 1–2 minutes for the installation to complete.
- Softaculous will provide two URLs:
- Site URL:
https://yoursite.com(your live site). - Admin URL:
https://yoursite.com/wp-admin(your dashboard).
- Site URL:
- Visit the admin URL, log in with your username and password, and explore the dashboard.
Method 2: Install WordPress Manually
If you prefer a hands-on approach or your hosting provider doesn’t offer cPanel, installing WordPress manually is a reliable option. This method is ideal for those who want full control over the setup process or are working with custom server environments. While it takes a bit more time and attention to detail, you’ll gain a deeper understanding of how WordPress works behind the scenes.
The manual method gives you more control and works on hosts without cPanel. It involves downloading WordPress, uploading files, and setting up a database.
Step 1: Download WordPress
- Go to wordpress.org.
- Click Download WordPress (latest version, e.g., 6.6).
- Save the
.zipfile to your computer.
Step 2: Create a Database
- Log into cPanel and find MySQL Databases or Database Wizard.
- Create a database (e.g.,
wp_database). - Create a database user (e.g.,
wp_user) with a strong password. - Add the user to the database with All Privileges.
- Note the database name, username, and password.
Step 3: Upload WordPress Files
- Unzip the WordPress
.zipfile on your computer. - Open an FTP client like FileZilla (free).
- Connect to your host:
- Host: Your domain or server IP.
- Username/Password: From your hosting account.
- Port: Usually 21.
- Upload the WordPress folder contents to the
public_htmldirectory (or a subfolder likepublic_html/blog). - Wait for the upload to finish (2–5 minutes).
Step 4: Run the Installation Script
- Visit your site (e.g.,
https://yoursite.com). - The WordPress setup wizard will appear.
- Select your language and click Continue.
- Enter database details:
- Database Name:
wp_database. - Username:
wp_user. - Password: Your database password.
- Database Host: Usually
localhost. - Table Prefix: Leave as
wp_or customize (e.g.,xyz_).
- Database Name:
- Click Submit, then Run the Installation.
Step 5: Complete Setup
- Fill in site details:
- Site Title: Your site’s name.
- Username: Choose a secure admin name.
- Password: Use a strong password.
- Email: Your admin email.
- Click Install WordPress.
- Log in at
https://yoursite.com/wp-admin.
Step 6: Test Your Site
For both methods:
- Visit your site (
https://yoursite.com) to see the default theme. - Log into the dashboard (
https://yoursite.com/wp-admin) and check settings. - Test on mobile—does it load correctly?
- Ensure HTTPS works (install an SSL certificate if needed).
Pro Tip: Install a backup plugin like UpdraftPlus right away to protect your site.
Real-World Use Cases
WordPress installation isn’t just a technical step—it’s the launchpad for real-world success. Here are some expanded examples of how different users have leveraged WordPress installs to achieve their goals:
-
The Food Blogger: After following the cPanel installation method on Bluehost, she had her WordPress site up and running in under half an hour. With the intuitive dashboard, she quickly customized her theme, installed a recipe plugin, and published her first post the same day. Within weeks, her blog started attracting readers, and she began collaborating with brands for sponsored content.
-
The Freelancer: A web developer needed to set up a portfolio for a client on a VPS without cPanel. Opting for the manual installation route, he configured the database, uploaded files via FTP, and fine-tuned the
wp-config.phpfor extra security. This hands-on approach gave him full control over the environment, allowing for custom optimizations and a unique design that impressed the client and led to more referrals. -
The Local Business Owner: A café owner wanted to accept online orders and showcase daily specials. Using SiteGround’s one-click installer, she launched her WordPress site with WooCommerce integration. With minimal technical know-how, she set up an online menu and ordering system. The result? A 25% increase in monthly sales and a loyal customer base that appreciated the convenience.
-
The Nonprofit Team: A small nonprofit needed a website to share updates and accept donations. They chose the manual install method on a budget host, learning the process step by step. The team used free themes and plugins to keep costs low, and the site helped them reach new donors and volunteers.
-
The Hobbyist: An aspiring photographer installed WordPress locally using tools like Local by Flywheel to experiment with themes and galleries before going live. This allowed for risk-free learning and creativity, resulting in a polished portfolio when the site was finally published.
These stories highlight that, whether you’re a beginner or a pro, installing WordPress opens the door to new opportunities—be it launching a business, building a brand, or simply sharing your passion with the world. The right installation method empowers you to take control and turn your ideas into reality.
Common Mistakes to Avoid
Before you dive into your new WordPress site, it’s important to be aware of some common pitfalls that can trip up beginners and experienced users alike. Avoiding these mistakes will save you time, frustration, and potential security headaches down the road. Here are some of the most frequent errors people make during installation—and how you can steer clear of them.
I’ve seen these slip-ups—don’t make them:
- Weak Credentials: Using “admin” or simple passwords invites hackers. Use strong, unique ones.
- No SSL: HTTPS is a must for security and SEO. Get a free certificate via cPanel or Let’s Encrypt.
- Wrong Directory: Installing in the wrong folder (e.g.,
public_html/wordpress) can mess up URLs. Double-check. - Skipping Backups: Always set up a backup plugin post-install to avoid data loss.
- Ignoring Updates: Update WordPress, themes, and plugins regularly for security.
cPanel vs. Manual vs. Other Methods
Here’s a side-by-side comparison of popular WordPress installation methods:
| Method | Best For | Skill Level | Speed | Control | Cost | Typical Use Case |
|---|---|---|---|---|---|---|
| cPanel (1-click) | Beginners, most users | Beginner | Fast (5–10 min) | Low–Medium | Low (shared hosting) | Quickest way on most shared hosts |
| Manual | Advanced, custom setups | Intermediate | Moderate (20–30 min) | High | Low | Full control, non-cPanel hosts, custom configs |
| Managed Hosting | Businesses, agencies | Beginner | Instant | Low | High ($20+/mo) | Hassle-free, premium support, auto updates |
| Local Install | Developers, hobbyists | Beginner–Int. | Fast | High | Free | Testing, development, learning, no live site risk |
| WP-CLI | Developers, sysadmins | Advanced | Fast | High | Low | Scripted installs, automation, VPS/cloud servers |
Installing WordPress on your hosting is like laying the foundation for a dream house—it’s the starting point for something amazing. Whether you go with cPanel’s one-click magic or the manual method’s hands-on approach, you’re just steps away from a live site. Test your setup, secure your credentials, and start building. Your blog, store, or portfolio is waiting to shine!
Don’t let tech fears stop you—install WordPress today and take control of your online presence. Got questions or a cool site idea? Share in the comments—I’m all ears!
FAQ
Q: How long does it take to install WordPress?
A: cPanel takes 5–10 minutes; manual takes 20–30 minutes.
Q: Do I need coding skills?
A: Nope! cPanel is point-and-click, and manual setup follows clear steps.
Q: Can I install WordPress without cPanel?
A: Yes, the manual method works on any host with FTP and database access.
Q: Is WordPress free?
A: The software is free, but you need hosting ($5+/month) and a domain ($10–$15/year).
Q: What if my install fails?
A: Double-check credentials, database settings, or contact your host’s support.
Further Reading
Loved this guide? Subscribe for more WordPress tips, or tell me about your site plans below!