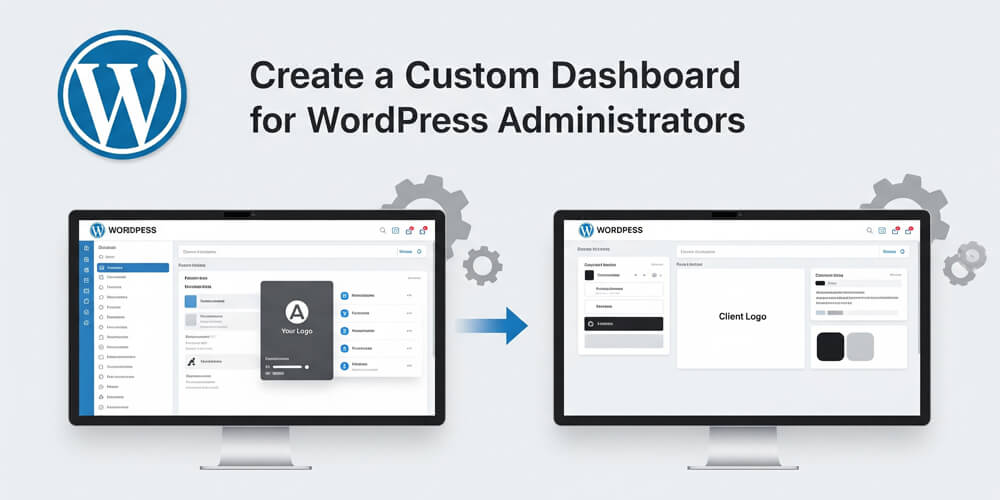
A custom WordPress dashboard empowers site administrators with a streamlined, intuitive interface tailored to their specific needs. By customizing the dashboard, you can declutter the default layout, highlight critical site metrics, and provide quick access to essential tools and resources. This not only improves usability and efficiency but also reinforces your brand identity and enhances the overall administrative experience.
In this guide, you’ll learn how to create a custom dashboard by leveraging WordPress hooks, adding and removing widgets, applying custom styles, and integrating useful site information—all without relying on third-party plugins.
Table of Contents
Open Table of Contents
- Removing Default Dashboard Widgets
- Adding a Custom Dashboard Widget
- Customizing the Dashboard Layout with CSS
- Creating a Custom Admin Menu Page
- Redirecting Users to the Custom Dashboard
- Displaying Important Site Information
- Customizing the Login Page
- Best Practices for Custom Dashboard Development
- Frequently Asked Questions (FAQ)
Removing Default Dashboard Widgets
By default, WordPress displays a variety of widgets on the admin dashboard, such as Activity, Quick Draft, At a Glance, and WordPress News. While these can be helpful, they may clutter the interface or provide information that isn’t relevant to your site’s administrators. Streamlining the dashboard by removing unnecessary widgets helps create a cleaner, more focused workspace. This not only improves usability but also allows you to highlight the most important information and tools for your team. In the following example, you’ll see how to remove default widgets to better tailor the dashboard to your needs.
function remove_default_dashboard_widgets() {
    remove_meta_box('dashboard_activity', 'dashboard', 'normal');
    remove_meta_box('dashboard_quick_press', 'dashboard', 'side');
    remove_meta_box('dashboard_right_now', 'dashboard', 'normal');
    remove_meta_box('dashboard_primary', 'dashboard', 'side');
}
add_action('wp_dashboard_setup', 'remove_default_dashboard_widgets');
This code snippet removes the default widgets from the WordPress dashboard, providing a cleaner interface for administrators. You can customize which widgets to remove based on your specific requirements.
Adding a Custom Dashboard Widget
Adding custom widgets allows you to display tailored information, quick links, or important notices directly on the dashboard. For example, you might show recent site statistics, pending tasks, support contact details, or helpful resources for your administrators. Custom widgets help streamline workflows and ensure that critical information is always visible and accessible, improving the overall admin experience.
function custom_dashboard_widget() {
    echo '<p>Welcome to your custom WordPress dashboard! Here are your latest updates.</p>';
}

function add_custom_dashboard_widget() {
    wp_add_dashboard_widget('custom_dashboard_widget', 'Custom Dashboard', 'custom_dashboard_widget');
}
add_action('wp_dashboard_setup', 'add_custom_dashboard_widget');
This code snippet creates a custom dashboard widget that displays a welcome message. You can modify the content of the widget to include any information relevant to your administrators, such as site statistics or important links.
Customizing the Dashboard Layout with CSS
You can significantly enhance the look and feel of your WordPress dashboard by injecting custom CSS. This allows you to match the dashboard’s appearance to your brand, improve readability, and highlight important elements for administrators. For example, you can change background colors, adjust widget padding, style headings, or even hide elements that are not relevant to your team. Custom CSS gives you full control over the dashboard’s visual presentation, ensuring a more cohesive and user-friendly admin experience.
function custom_dashboard_styles() {
    echo '<style>
        #wpadminbar { background-color: #23282d; }
        .custom-dashboard-widget { background: #f1f1f1; padding: 10px; }
    </style>';
}
add_action('admin_head', 'custom_dashboard_styles');
This code snippet adds custom styles to the WordPress dashboard, changing the admin bar’s background color and styling the custom dashboard widget. You can expand this CSS to further customize the dashboard’s appearance according to your preferences.
Creating a Custom Admin Menu Page
To provide administrators with a truly tailored experience, you can create a dedicated admin menu page within the WordPress dashboard. This custom page can serve as a central hub for important site information, quick actions, documentation, or any tools your team needs. By adding your own menu item, you ensure that administrators have easy, one-click access to your custom dashboard, separate from the default WordPress widgets.
This approach is especially useful for agencies, multi-author sites, or organizations that require a branded, streamlined interface. You can populate the custom page with analytics, support links, onboarding resources, or even embed third-party services—making it a powerful command center for your site’s management.
function custom_dashboard_menu() {
    add_menu_page(
        'Admin Dashboard',
        'Custom Dashboard',
        'manage_options',
        'custom-dashboard',
        'custom_dashboard_page',
        'dashicons-admin-home',
        2
    );
}
add_action('admin_menu', 'custom_dashboard_menu');

function custom_dashboard_page() {
    echo '<h1>Welcome to Your Custom Admin Dashboard</h1>';
    echo '<p>Here, you can manage all your website activities in one place.</p>';
}
This code snippet creates a custom admin menu page titled “Custom Dashboard” that administrators can access. The page includes a welcome message and can be expanded to include any relevant information or tools.
Redirecting Users to the Custom Dashboard
To enhance user experience and ensure administrators always land on your tailored dashboard, you can automatically redirect them from the default WordPress dashboard to your custom admin page. This approach streamlines workflows by making your custom dashboard the central hub for site management, eliminating unnecessary steps and reducing confusion—especially for non-technical users or teams with specific requirements.
By implementing this redirect, you guarantee that every time an administrator logs in or accesses the dashboard, they are immediately presented with the tools, resources, and information most relevant to their role.
function redirect_to_custom_dashboard() {
    if (is_admin() && !defined('DOING_AJAX') && current_user_can('manage_options')) {
        wp_redirect(admin_url('admin.php?page=custom-dashboard'));
        exit;
    }
}
add_action('admin_init', 'redirect_to_custom_dashboard');
This code snippet redirects administrators to the custom dashboard page whenever they access the admin area. It checks if the user has the necessary permissions and ensures that the redirect does not interfere with AJAX requests.
Displaying Important Site Information
A truly effective custom dashboard should surface the most important and actionable information for your administrators at a glance. You can retrieve and display useful data, such as recent posts, pending comments, user activity, or site statistics, directly within your custom dashboard widget. This approach helps administrators stay informed and quickly access key areas of the site without navigating through multiple menus.
For example, you might show a list of the latest published posts, highlight new user registrations, display pending updates, or summarize site analytics. By tailoring the displayed information to your team’s needs, you create a more productive and user-friendly admin experience.
function custom_dashboard_widget_content() {
    $latest_posts = get_posts(array('numberposts' => 5));
    echo '<h3>Latest Posts</h3><ul>';
    foreach ($latest_posts as $post) {
        echo '<li><a href="' . get_permalink($post->ID) . '">' . $post->post_title . '</a></li>';
    }
    echo '</ul>';
}
add_action('wp_dashboard_setup', function() {
    wp_add_dashboard_widget('custom_dashboard_data', 'Site Overview', 'custom_dashboard_widget_content');
});
This code snippet retrieves the latest five posts and displays them in a custom dashboard widget. You can modify the query to include other types of information, such as comments or user activity, depending on your site’s needs.
Customizing the Login Page
To provide a seamless and branded experience for your administrators, it’s important to customize the WordPress login page to match the look and feel of your custom dashboard. By modifying the login page, you can reinforce your site’s identity, create a more professional appearance, and ensure consistency across all admin interfaces.
Customizing the login page typically involves adding your own logo, changing background colors, and adjusting form styles to align with your brand guidelines. You can also include helpful links, custom messages, or even additional security features. This not only enhances the visual appeal but also improves usability and makes the login process more welcoming for your team.
Below is an example of how to inject custom CSS into the WordPress login page, allowing you to tailor its appearance to your preferences.
function custom_login_styles() {
    echo '<style>
        body.login { background-color: #23282d; }
        .login h1 a { background-image: url("/path-to-logo.png"); }
    </style>';
}
add_action('login_head', 'custom_login_styles');
This code snippet customizes the WordPress login page by changing the background color and adding a custom logo. You can further enhance the login page by adding more styles or functionality as needed.
Best Practices for Custom Dashboard Development
When creating a custom WordPress dashboard, it’s essential to follow best practices to ensure maintainability, performance, and user experience. Here are some key recommendations:
- Keep It Simple: Avoid overwhelming administrators with too much information or too many widgets. Focus on the most relevant data and tools.
- Use Hooks and Filters: Leverage WordPress hooks and filters to modify the dashboard without altering core files. This ensures compatibility with future updates and other plugins.
- Test for Performance: Custom widgets and styles can impact dashboard performance. Test your customizations to ensure they load quickly and do not slow down the admin area.
- Maintain Accessibility: Ensure that your custom dashboard is accessible to all users, including those with disabilities. Use semantic HTML and follow accessibility guidelines.
- Document Your Code: Comment your code and provide documentation for your custom dashboard features. This will help other developers understand your work and make future modifications easier.
- Regularly Update: Keep your custom dashboard updated with the latest WordPress standards and practices. Regular updates help maintain security and compatibility with new WordPress versions.
- Backup Before Changes: Always back up your site before making significant changes to the dashboard. This ensures you can restore functionality if something goes wrong.
- Use Child Themes or Custom Plugins: Place your custom dashboard code in a child theme or a custom plugin to prevent losing changes during WordPress updates. This also keeps your modifications organized and separate from the core theme files.
- Consider User Roles: Tailor the dashboard experience based on user roles. Not all administrators need access to the same information or tools, so customize the dashboard accordingly.
- Monitor User Feedback: After implementing your custom dashboard, gather feedback from users to identify areas for improvement. This will help you refine the dashboard and enhance the overall user experience.
A custom WordPress dashboard enhances the administrative experience, providing a clean and efficient workspace. By removing clutter, adding custom widgets, and redirecting users to a custom admin page, you can greatly improve usability and efficiency for site administrators.
Frequently Asked Questions (FAQ)
-
Can I revert to the default WordPress dashboard after customization?
Yes, you can revert to the default dashboard by removing or commenting out the custom code from your theme’sfunctions.phpfile or custom plugin. The default widgets and layout will return once the customizations are disabled. -
Will custom dashboard changes affect other users or plugins?
Custom dashboard changes typically affect all users with access to the admin area, depending on the permissions you set in your code. Always test your changes to ensure compatibility with other plugins and user roles. -
How do I add more complex widgets, like charts or analytics?
You can add complex widgets by including additional HTML, JavaScript, or integrating third-party APIs within your custom widget functions. Enqueue necessary scripts and styles using WordPress best practices for admin pages. -
Is it safe to modify the dashboard on a live site?
It’s best to test all customizations on a staging or development environment before applying them to a live site. This helps prevent potential issues and ensures a smooth experience for administrators. -
Can I restrict custom dashboard features to specific user roles?
Yes, you can use WordPress capability checks (likecurrent_user_can('manage_options')) in your code to display or hide dashboard features based on user roles. -
Will WordPress updates overwrite my custom dashboard code?
If you place your code in a child theme or a custom plugin, WordPress updates will not overwrite your changes. Avoid editing core files to ensure your customizations persist after updates. -
How can I further secure my custom dashboard?
Follow WordPress security best practices: validate and sanitize all data, use nonces for form submissions, and limit access to sensitive features based on user roles and capabilities. -
Can I add custom dashboard widgets without using plugins?
Yes, you can add custom widgets directly in your theme’sfunctions.phpfile or a custom plugin by using thewp_add_dashboard_widgetfunction. -
How do I hide dashboard widgets for specific user roles?
Use conditional checks likecurrent_user_can()within your widget or removal functions to target specific roles. -
Can I customize the dashboard for different user roles?
Yes, you can create role-based widgets or layouts by checking user capabilities and displaying different content accordingly. -
Is it possible to add links or buttons to external tools in the dashboard?
Absolutely. You can include HTML links or buttons in your custom widgets to provide quick access to external resources or tools. -
How do I ensure my custom dashboard is accessible?
Use semantic HTML, proper heading structure, and ensure sufficient color contrast in your custom styles. Test with screen readers and keyboard navigation. -
Can I use JavaScript frameworks like React or Vue in dashboard widgets?
Yes, you can enqueue your JavaScript bundles and render React or Vue components inside your custom dashboard widgets, but keep performance in mind. -
How do I debug issues with custom dashboard code?
Useerror_log(), browser developer tools, and WordPress debugging features likeWP_DEBUGto troubleshoot problems in your custom code. -
What’s the best way to organize large dashboard customizations?
For maintainability, use a custom plugin or modularize your code into separate files and functions, keeping logic organized and documented.