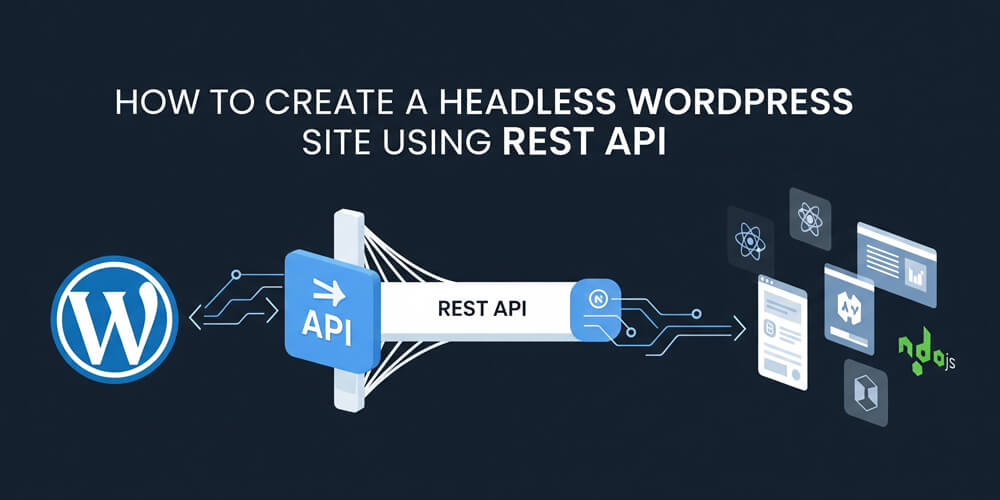
WordPress powers over 40% of the web, but its traditional setup—where the backend and frontend are tightly coupled—can feel limiting for modern web development. Enter headless WordPress: a setup where WordPress handles content management (the backend) while a separate frontend, built with JavaScript frameworks like React, delivers a fast, dynamic user experience. The WordPress REST API makes this possible by providing a bridge between your content and your frontend. In this guide, I’ll show you how to create a headless WordPress site, step by step, using the REST API. From setting up WordPress to fetching posts in a React app, you’ll learn everything you need to go headless with confidence.
Table of Contents
Open Table of Contents
- About Headless WordPress Site
- Step-by-Step Guide to Creating a Headless WordPress Site
- Real-World Use Cases
- Pros and Cons of Headless WordPress
- Common Mistakes to Avoid
- Headless CMS Comparison Table
- Benefits of Headless WordPress
- SEO and Performance Considerations
- Frequently Asked Questions (FAQs)
- Further Reading
About Headless WordPress Site
A headless WordPress site leverages WordPress solely as a backend content management system (CMS), separating it entirely from the frontend presentation layer. Instead of using traditional WordPress themes to render pages, all content—such as posts, pages, media, and custom fields—is accessed via the WordPress REST API, which exposes this data as JSON.
This decoupled architecture allows developers to build the frontend using any technology or framework they prefer, such as React, Vue.js, Next.js, or even mobile apps. The frontend fetches content from the WordPress backend through API requests and is responsible for rendering, routing, and user interactions.
Key benefits of this approach include:
- Flexibility: Choose any frontend stack and design system.
- Performance: Modern frameworks and static site generators can deliver faster load times.
- Multi-channel delivery: Serve the same content to websites, mobile apps, or other platforms.
- Enhanced security: The WordPress admin and backend can be hidden from the public internet.
In summary, a headless WordPress site transforms WordPress into a powerful, API-driven content hub, enabling modern, scalable, and highly customizable digital experiences.
Why Go Headless?
Choosing a headless approach with WordPress offers a range of advantages for developers and content creators alike. By decoupling the backend from the frontend, you gain the freedom to use modern JavaScript frameworks, improve site performance, and deliver content across multiple platforms. Below are some of the main reasons why going headless with WordPress can be a smart move for your next project.
- Performance: JavaScript frontends are often faster than traditional WordPress themes.
- Flexibility: Use modern frameworks like React or Vue.js for dynamic UIs.
- Scalability: Serve content to multiple platforms (web, mobile apps, IoT).
- Security: Hide the WordPress backend from public access.
- Developer Freedom: Build custom frontends without theme constraints.
When to Use a Headless WordPress Site?
When considering whether to use a headless WordPress setup, it’s important to evaluate your project’s specific needs and goals. Headless architecture is not always the best fit for every website, but it excels in scenarios where flexibility, performance, and multi-platform content delivery are priorities. Below are some common situations where adopting a headless WordPress site can provide significant advantages.
- Modern Web Apps: For dynamic, app-like experiences.
- Multi-Platform Needs: When delivering content to web, mobile, or APIs.
- Performance-Critical Sites: To meet Google’s Core Web Vitals.
- Developer Projects: When you want full control over the frontend.
- E-commerce: For custom storefronts using WooCommerce with a React or Vue.js frontend.
Benefits of Using the REST API
The WordPress REST API is a powerful tool that enables developers to interact with WordPress content programmatically. By exposing WordPress data as JSON, it allows for seamless integration with various frontend technologies. Here are some key benefits of using the REST API in a headless WordPress setup:
- Decoupled Architecture: Separate the backend from the frontend, allowing for greater flexibility in design and technology choices.
- Real-Time Data Access: Fetch posts, pages, and custom content types dynamically without page reloads.
- Cross-Platform Compatibility: Use the same API to deliver content to websites, mobile apps, or IoT devices.
- Custom Endpoints: Create custom API endpoints for specific data needs, enhancing functionality.
- Enhanced Security: Limit public access to the backend while still delivering content through the API.
Step-by-Step Guide to Creating a Headless WordPress Site
Let’s build a simple headless WordPress site with a React frontend that fetches and displays blog posts via the REST API. This hands-on walkthrough will guide you through each step, from setting up your WordPress backend to deploying a modern React-powered frontend.
By the end, you’ll understand how to connect your frontend to WordPress, securely fetch content, and display it dynamically—unlocking the flexibility and performance benefits of a decoupled architecture. Whether you’re new to headless CMS or looking to modernize your workflow, this guide will provide practical, real-world techniques you can apply to your own projects.
Step 1: Set Up Your WordPress Backend
Before you start building a headless WordPress site, you need a solid backend foundation. This section covers the essential steps to set up your WordPress instance, ensure the REST API is available, and create sample content for testing. By preparing your backend properly, you’ll make it easy for your frontend application to fetch and display content seamlessly using the WordPress REST API.
-
Install WordPress:
- Set up a WordPress instance locally (using Local by Flywheel) or on a hosting provider.
- Install a lightweight theme like Astra to manage the backend (you won’t need it for the frontend).
-
Enable the REST API:
- The WordPress REST API is enabled by default since version 4.7 (2016). Verify by visiting
your-site.com/wp-json/wp/v2/posts. - Install the WP REST API plugin for additional endpoints if needed (optional).
- The WordPress REST API is enabled by default since version 4.7 (2016). Verify by visiting
-
Create Sample Content:
- Add a few posts and pages in the WordPress dashboard to test API data.
Step 2: Secure the WordPress Backend
Security is crucial when exposing your WordPress backend to the public, especially in a headless setup. By default, the REST API is accessible to anyone, which can lead to unauthorized access if not properly secured. This section outlines best practices for securing your WordPress backend, ensuring that only authenticated requests can access sensitive data while still allowing your frontend to fetch content.
- Hide the Admin: Use a plugin like WPS Hide Login to change the login URL (e.g., from
/wp-adminto/secret-login). - Authentication: For restricted endpoints, use JWT authentication (e.g., JWT Authentication for WP REST API plugin).
- Disable Unnecessary Endpoints: Use a plugin like Disable REST API to limit public access.
Step 3: Set Up the Frontend (React Example)
To build a headless WordPress site, you need a modern frontend framework to consume the REST API and display content dynamically. In this example, we’ll use React as our frontend technology. React is a popular choice for building interactive user interfaces, and it works seamlessly with the WordPress REST API.
We’ll use React with Create React App for the frontend, hosted on Vercel.
-
Install Node.js:
- Download and install Node.js from nodejs.org.
-
Create a React App:
- Open your terminal and run:
npx create-react-app headless-wordpress
cd headless-wordpress
npm start
This command sets up a new React application named
headless-wordpressand starts the development server. -
Install Axios:
- Use Axios to fetch data from the WordPress REST API:
npm install axios
Step 4: Fetch WordPress Data
Fetching data from the WordPress REST API is the core of any headless WordPress project. In this section, you’ll learn how to connect your React frontend to your WordPress backend and retrieve posts dynamically. We’ll walk through creating a simple React component that fetches and displays blog posts using Axios, making it easy to render your WordPress content in a modern, decoupled frontend.
-
Create a component to fetch and display posts. Replace
src/App.jswith:import React, { useState, useEffect } from 'react'; import axios from 'axios'; import './App.css'; function App() { const [posts, setPosts] = useState([]); const [loading, setLoading] = useState(true); useEffect(() => { axios.get('https://your-site.com/wp-json/wp/v2/posts') .then(response => { setPosts(response.data); setLoading(false); }) .catch(error => { console.error('Error fetching posts:', error); setLoading(false); }); }, []); if (loading) return <p>Loading...</p>; return ( <div className="App"> <h1>My Headless WordPress Blog</h1> <div className="posts"> {posts.map(post => ( <div key={post.id} className="post"> <h2>{post.title.rendered}</h2> <div dangerouslySetInnerHTML={{ __html: post.content.rendered }} /> </div> ))} </div> </div> ); } export default App;This code sets up a React component that fetches posts from your WordPress site using the REST API. It uses Axios to make the HTTP request and displays the posts once they are loaded.
-
Update the API URL:
- Replace
https://your-site.com/wp-json/wp/v2/postswith your actual WordPress site URL.
- Replace
-
Run the React App:
- In your terminal, run:
npm startThis command starts the React development server, and you can view your app at
http://localhost:3000. -
Add basic styles in
src/App.css:.App { max-width: 800px; margin: 0 auto; padding: 20px; } .post { margin-bottom: 40px; } .post h2 { color: #333; }
Step 5: Deploy the Frontend
Deploying your React frontend is the final step in making your headless WordPress site accessible to the world. In this section, you’ll learn how to push your code to GitHub and deploy it using Vercel, a popular platform for hosting modern web applications. This process ensures your site is live, scalable, and benefits from features like automatic updates and global CDN delivery.
-
Push to GitHub:
- Create a GitHub repository and push your React app.
- Run:
git init git add . git commit -m "Initial commit" git remote add origin <your-repo-url> git push origin main -
Deploy on Vercel:
- Sign up at vercel.com.
- Import your GitHub repo and deploy with default settings.
Step 6: Configure CORS (if needed)
If your React app is hosted on a different domain than your WordPress backend, you may need to configure CORS (Cross-Origin Resource Sharing) to allow requests from your frontend.
- Install CORS Plugin: Use the CORS plugin in WordPress to allow requests from your frontend domain.
- Configure Allowed Origins: Set the allowed origins to your React app’s URL (e.g.,
https://your-app.vercel.app). - Test CORS: Ensure your React app can fetch data without CORS errors in the browser console.
- Example CORS Configuration: In the CORS plugin settings, add your frontend URL under “Allowed Origins”.
{
  "allowed_origins": [
    "https://your-app.vercel.app"
  ]
}
Step 7: Test and Optimize
Testing and optimizing your headless WordPress site is essential to ensure a smooth user experience and robust performance. After deploying your frontend, take time to verify that all content loads correctly, the interface is responsive across devices, and there are no errors or bottlenecks. This step helps you catch issues early, improve site speed, and deliver a polished, professional product to your audience.
- Test the Frontend: Visit your deployed URL (e.g.,
your-app.vercel.app) to see WordPress posts. - Check Responsiveness: Test on mobile, tablet, and desktop.
- Optimize Performance: Use lazy loading for images and minify assets with Vite (if you switch from Create React App).
Real-World Use Cases
Headless WordPress is powering a wide range of projects, from personal blogs to enterprise-level applications. Here are some practical examples that showcase its flexibility and impact:
Case 1: Blog with React Frontend
Sarah, a travel blogger, wanted a site that loaded quickly and offered a modern, interactive experience for her readers. By decoupling WordPress and using React for the frontend, she leveraged the REST API to fetch posts and pages dynamically. React’s component-based architecture enabled smooth page transitions, interactive maps, and animated galleries. As a result, her blog’s bounce rate dropped by 20%, and user engagement increased by 30%. Content updates remained easy through the familiar WordPress dashboard, while the frontend delivered a seamless, app-like experience.
Case 2: E-commerce App
John runs a WooCommerce-powered online store and wanted to expand to mobile without rebuilding his backend. By exposing WooCommerce products via the REST API (/wp-json/wc/v3/products), he built a cross-platform mobile app using React Native. The app fetched product data, inventory, and orders in real time, ensuring consistency across web and mobile. Push notifications and in-app promotions boosted sales, while centralized content management in WordPress simplified updates. This headless approach enabled John to reach new customers and streamline product management across platforms.
Case 3: Client Portfolio
For a design agency’s portfolio, I implemented a headless architecture using WordPress as the CMS and Vue.js for the frontend. The REST API delivered project data, testimonials, and team profiles as JSON. Vue’s reactivity enabled dynamic filtering, smooth transitions, and real-time updates without page reloads. The result was a visually engaging, lightning-fast portfolio that impressed clients and improved inquiries by 25%. Editors could easily add new projects in WordPress, while the frontend automatically reflected changes.
These examples illustrate how headless WordPress empowers creators and businesses to deliver fast, flexible, and engaging digital experiences—whether for blogs, e-commerce, or portfolios—by combining the power of WordPress with modern frontend frameworks.
Pros and Cons of Headless WordPress
Headless WordPress offers a modern approach to web development, but it’s important to weigh its strengths and limitations before making the switch. This section outlines the main advantages and drawbacks of using WordPress in a headless architecture. Understanding these pros and cons will help you decide if headless WordPress is the right solution for your project’s needs and long-term goals.
| Pros | Cons |
|---|---|
| Blazing-fast frontend performance | Requires JavaScript framework knowledge |
| Flexible, modern UI with React/Vue | Complex setup compared to traditional WordPress |
| Multi-platform content delivery | Limited plugin compatibility |
| Enhanced security (hidden backend) | Higher hosting costs for frontend/backend |
| Developer-friendly customization | No native WordPress preview |
| Easy to scale and maintain | Requires API management and testing |
Common Mistakes to Avoid
Transitioning to a headless WordPress setup can be transformative, but it’s easy to stumble into common pitfalls—especially if you’re new to decoupled architectures. Understanding these mistakes ahead of time will help you avoid unnecessary headaches, streamline your workflow, and ensure your project’s long-term success. Here are some of the most frequent errors developers make when building headless WordPress sites, and how you can steer clear of them.
- Not Securing the Backend: Always hide the WordPress admin and use authentication.
- Ignoring Performance: Optimize both backend (e.g., WP Rocket) and frontend (e.g., code splitting).
- Overcomplicating the Frontend: Start with a simple framework like React.
- Skipping Testing: Test API endpoints and frontend rendering thoroughly.
- Neglecting SEO: Use Next.js or Gatsby for server-side rendering to improve SEO.
Headless CMS Comparison Table
Choosing the right headless CMS is crucial for your project’s success. While WordPress is a popular choice, there are several other platforms—each with unique strengths and trade-offs. The table below compares headless WordPress with traditional WordPress and leading headless CMS options like Strapi, Contentful, Sanity, and Ghost. Use this comparison to evaluate which platform best fits your content management, customization, and scalability needs.
| Feature / Platform | Headless WordPress | Traditional WordPress | Strapi | Contentful | Sanity | Ghost |
|---|---|---|---|---|---|---|
| Content Editing UX | ⭐⭐⭐⭐⭐ | ⭐⭐⭐⭐⭐ | ⭐⭐⭐ | ⭐⭐⭐⭐ | ⭐⭐⭐⭐ | ⭐⭐⭐⭐ |
| API-First | ⭐⭐⭐ | ⭐ | ⭐⭐⭐⭐⭐ | ⭐⭐⭐⭐⭐ | ⭐⭐⭐⭐⭐ | ⭐⭐⭐⭐ |
| Plugin Ecosystem | ⭐⭐⭐⭐ | ⭐⭐⭐⭐⭐ | ⭐⭐ | ⭐⭐ | ⭐⭐ | ⭐⭐ |
| Customization | ⭐⭐⭐⭐ | ⭐⭐⭐⭐ | ⭐⭐⭐⭐ | ⭐⭐⭐ | ⭐⭐⭐⭐ | ⭐⭐⭐ |
| Hosting Flexibility | ⭐⭐⭐⭐ | ⭐⭐⭐ | ⭐⭐⭐⭐⭐ | ⭐⭐⭐⭐⭐ | ⭐⭐⭐⭐⭐ | ⭐⭐⭐⭐⭐ |
| Open Source | ✅ | ✅ | ✅ | ❌ | ✅ | ✅ |
| Best For | Blogs, Sites | Blogs, Sites | Apps, APIs | Enterprise | Apps, APIs | Blogs |
Benefits of Headless WordPress
Headless WordPress combines the power of WordPress as a content management system with the flexibility of modern frontend frameworks. By decoupling the backend from the frontend, you gain greater control over site speed, design, and scalability. In this section, we’ll explore the key benefits of using WordPress in a headless architecture and why it’s an increasingly popular choice for developers and businesses alike.
- Speed: JavaScript frontends with CDNs deliver sub-second load times.
- Flexibility: Use any frontend framework or technology.
- Scalability: Serve content to web, mobile, or APIs.
- Security: Hide WordPress from public access.
- Modern UX: Create app-like experiences with dynamic UIs.
SEO and Performance Considerations
When building a headless WordPress site, SEO and performance require special attention. Unlike traditional WordPress, where themes handle metadata and optimization, a decoupled frontend means you must implement best practices yourself. This section covers essential strategies to ensure your headless site remains discoverable by search engines and delivers a fast, seamless user experience. By following these tips, you can maximize both visibility and performance for your modern web project.
- Server-Side Rendering: Use Next.js or Gatsby to pre-render pages for SEO.
- Caching: Use WP Rocket on the backend and a CDN (e.g., Cloudflare) for the frontend.
- Image Optimization: Fetch optimized images via the REST API with plugins like ShortPixel.
- Minification: Minify frontend assets with tools like Vite.
- Schema Markup: Add structured data in WordPress with Yoast SEO for better search visibility.
Going headless with WordPress and the REST API opens up a world of possibilities for fast, flexible, and modern websites. By using WordPress as a robust CMS and pairing it with a JavaScript frontend, you can create dynamic, high-performance sites that stand out. Whether you’re building a blog, e-commerce platform, or portfolio, this guide provides the foundation to get started. Set up your WordPress backend, secure it, and experiment with a React frontend today!
Ready to go headless? Try this tutorial and share your project in the comments! Subscribe for more WordPress and development tips.
Frequently Asked Questions (FAQs)
-
What is the WordPress REST API?
It’s a built-in API that delivers WordPress content (posts, pages, etc.) as JSON, enabling headless setups. -
Do I need coding skills for headless WordPress?
Yes, basic knowledge of PHP (for WordPress) and JavaScript (for the frontend) is required. -
Is headless WordPress good for SEO?
Yes, with server-side rendering (e.g., Next.js) and proper optimization, it can match or exceed traditional WordPress SEO. -
Can I use plugins with headless WordPress?
Some plugins (e.g., Yoast, WooCommerce) work via the REST API, but frontend-specific plugins may not. -
What’s the best frontend framework for headless WordPress?
React (with Next.js) and Vue.js are popular for their performance and ecosystem. -
Can I add custom post types and fields?
Yes, you can register custom post types and fields in WordPress, and expose them via the REST API for your frontend. -
How do I handle authentication for protected content?
Use JWT or OAuth authentication plugins to secure REST API endpoints and authenticate frontend requests. -
Can I add custom endpoints to the REST API?
Yes, you can register custom REST API routes in WordPress using PHP and theregister_rest_routefunction. -
How do I manage media and images in a headless setup?
Media is available via the/wp-json/wp/v2/mediaendpoint. Fetch URLs and metadata for use in your frontend. -
Is it possible to preview unpublished content?
Yes, but you’ll need to implement a preview system in your frontend and use authenticated API requests to fetch drafts. -
Can I migrate an existing WordPress site to headless?
Yes, you can keep your content and migrate the frontend to a JavaScript framework, fetching data via the REST API. -
How do I optimize performance in a headless WordPress site?
Use caching plugins for the backend, a CDN for the frontend, and optimize API requests and assets. -
Is headless WordPress suitable for e-commerce?
Yes, WooCommerce exposes products and orders via the REST API, allowing you to build custom storefronts. -
Can I add custom events without plugins?
Yes, you can add custom events by extending your frontend code to send events to analytics or other services.
Further Reading
Loved this guide? Subscribe for weekly WordPress tutorials or share your headless project below!